I finally got to take Vanessa out of a spin (my car’s name is Vanessa, remember?). We had a fabulous time cruising Utah County and blasting our favorite tunes (I’m only a little crazy). I really wish there were more places where I could drop the pedal and let loose. This car is built for speed and I really don’t get to take advantage of that. Sometimes I think maybe it’s time to get a new hobby… but then I go for a ride and fall in love again.
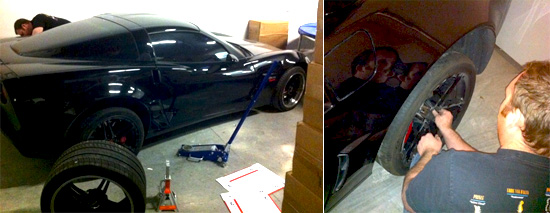
So yesterday I swung by work to help Jim swap his tires (the pictures below are his car, not mine). He’s got a set of Forgeline rims in the back and the leak. Not the tires- the rims. These particular rims are a three piece forged set and the leak is occurring where the pieces are bolted together. Yes sir, with this kind of performance even your rims need maintenance.

Anyway, I helped Jim swap his wheels off. Wheel swapping is pretty easy on most cars. Vettes with tires that are 12.5″ across and that weigh about 40 lbs are a little trickier. Just a quick set of instructions to help all you people who want to change their Vette tires (or any tires).
Items I recommend:
1. Car Jack (low profile)
2. Jack Pads
3. Torque wrench
4. Wrench extender (pictured in kit above- you may need this is your rims have deep lips).
5. Wrench bit that fits your lugs (size will vary based on what wheel you have on your car).
5. Locking lug key (if applicable- sometimes nice wheels come with a special lug to deter theft).
Steps to remove / change tires:
1. Put your parking break on.
2. Underneath the car about to feet from the rear ties there is an oval hole. You can put your jack pad there or jack directly from this spot.
3. Carefully position your Jack and pump it up until it’s firmly in place, but don’t lift your car of the ground yet.
4. Loosen your lugs. Here’s a great article on wheel lug torquing, including how to loosen and tighten your lugs.
5. Jack the car up until the tire is off the ground. You can use a car jack stand if you can any concerns that your car might fall.
6. Finish loosening the lugs and remove them.
7. Firmly grip the tire and pull it off the vehicle (and remember, you can roll a tire- you don’t have to lift it to put it somewhere).
8. Give you rotor and brake calipers a little cleaning if you want
9. Lift on the new tire, light up the holes with the lug bolts, and refer to the torquing guide above again.
10. Remove you jack lift (if applicable), lower your car and repeat on the other side.
Remember: after you drive you car 50-100 miles you should tighten the lugs again!
Just in case you’re curious about why you’d be removing or changing tires, here a few good reasons:
1. You’ve got one set of street tires and one set of track tires and you need to switch them.
2. You’ve got a flat and you’re putting on a spare
3. Wheel maintenance (tire, rim, TPMS, etc).
4. Assembly maintenance (breaks, calipers, rotor, etc)
5. Left / Right tire rotation
6. Because you’ve got a sick idea of fun.
Anyway, now that the weather is a littler better (could we do something about these roads? They are awful!), batteries are charged and wheels are swapped maybe you’ll see us on the road again.
Posted Jan 30, 2011 by Cam Hughes
