What Luck!

HughesFamily.com finally expired (someone let it drop) and I was able to pick it up from the GoDaddy auctions. For any other other bidders who may visit here to see who ended up with this: It’s in good hands. Don’t feel too bad- I was ready to go into the thousands to get this if I needed to (and Dave, if I was bidding against you again, man… I swear… I’ll kick your butt).

My plans for this domain are simple. I’ll optimize it for keywords like “Howard Hughes” and sell ad space thus netting millions! Nope. I’ll probably just use this as a hub for my family. Most of them are tiny now, but soon they will be using the Internet and, instead of actual family gatherings, we can meet online (virtually) here at HughesFamily.com.

I’ve popped in some links if you want to learn more about us, what we do, what we like (so you can send us gifts, of course). Yes indeed- very pleased to get this domain.

Cam


Hoosiers Daddy!

On September 30th I’m going up to Rocky Mountain Raceway for the last of the midnight drags. If the stars align I’m going to run an 11 second quarter mile (11.9 seconds or less). I’ve got everything I need and I’m 99% sure I can do it…

My biggest problem has been traction. Specifically that I don’t have any. Last year I picked sway bars over slicks… but this year I went with the slicks. I got set of Hoosier R6 drag radials and put them on my stock rims (which I was clever enough to keep).

The Hoosiers are a huge improvement! They are really sticky and grab way better than my Michelin PS2 street tires. I still spin pretty bad in 1st gear but when they hook there’s no spinning in any other gears. I got the Hoosiers from my local Discount Tire- they are super friendly guys and have great service (they matched an online price for me).

For the front I picked up a set of Michelin Pilot Super Sports. These are pretty light tires at about 25 lbs each. Every little bit helps…

The more rotating mass you can get rid of the better you’ll do. I chopped about 16lbs off the clutch/flywheel, another 12 pounds each for the rear wheels (stock rims w/ Hoosiers) and then 7 pounds each on the front wheels (stock rims w/ Michelins). 54 lbs of rotating mass. Gone.

And now I have some traction. Come on stars… align.


Posted by Cam, September 25, 2011

B&M Sport Shifter (How to Change Your Shifter)

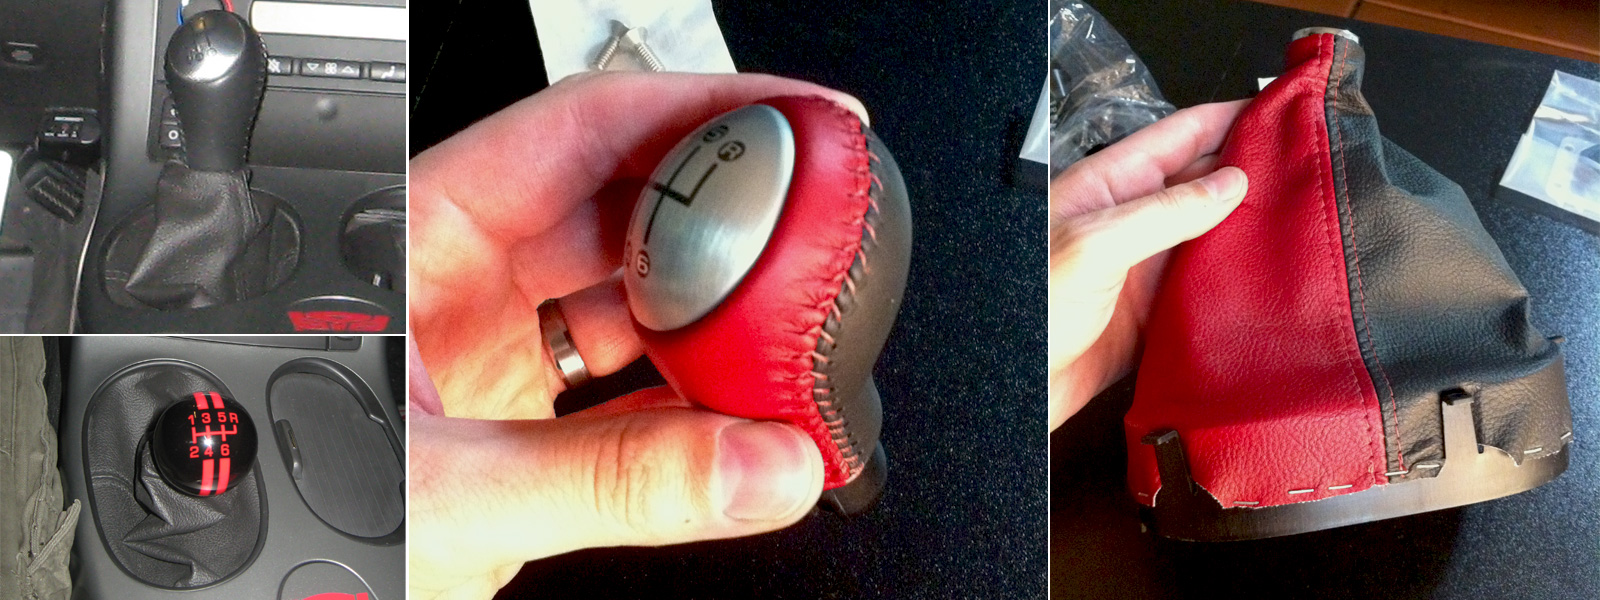
I decided upgrade my shifter, shift boot and shift knob.  For the shifter I decided to go with a B&M 45044 precision sport shifter. The shift boot & knob are OEM two tone cobalt red & ebony.

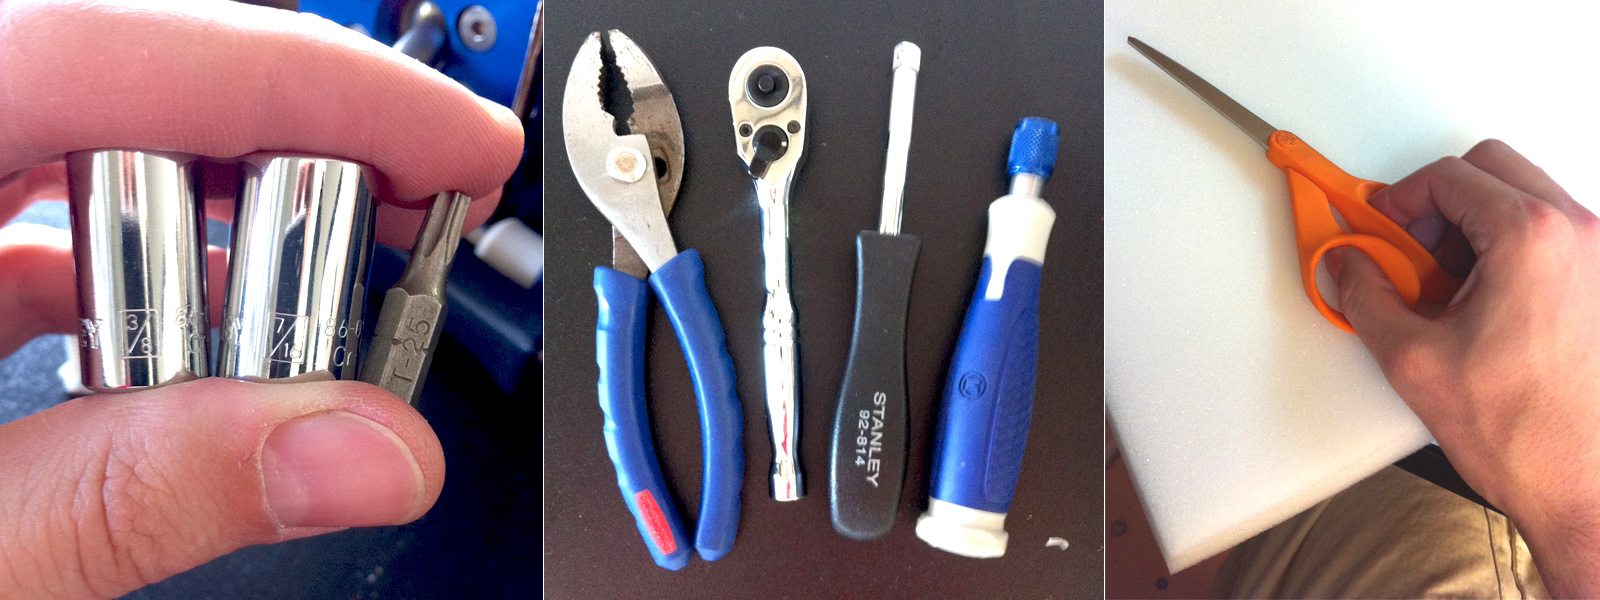
First things first. If you decide to swap out your stock shifter here are the tools you’ll need:  3/8 &  7/16 hex head socket bits & T-25 torx bit. You’ll also need drivers for the hex and Torx bits as well as a pair of pliers. Optional but also recommend: some high density flame retardant foam and pair of scissors.

Shift knobs come and go. The stock shift knob has a great feel, but I felt like the throw was too long and didn’t particularly care for the color on the gear pictograph. I swapped to a ball knob last year -which has the effect of lowering the shift knob thus reducing the throw- and I liked that okay, but when I saw the red & black boot and shift knob I knew it was time to swap again. One one little issue: the new knob was for a 2008+ Vette and I have a 2007.

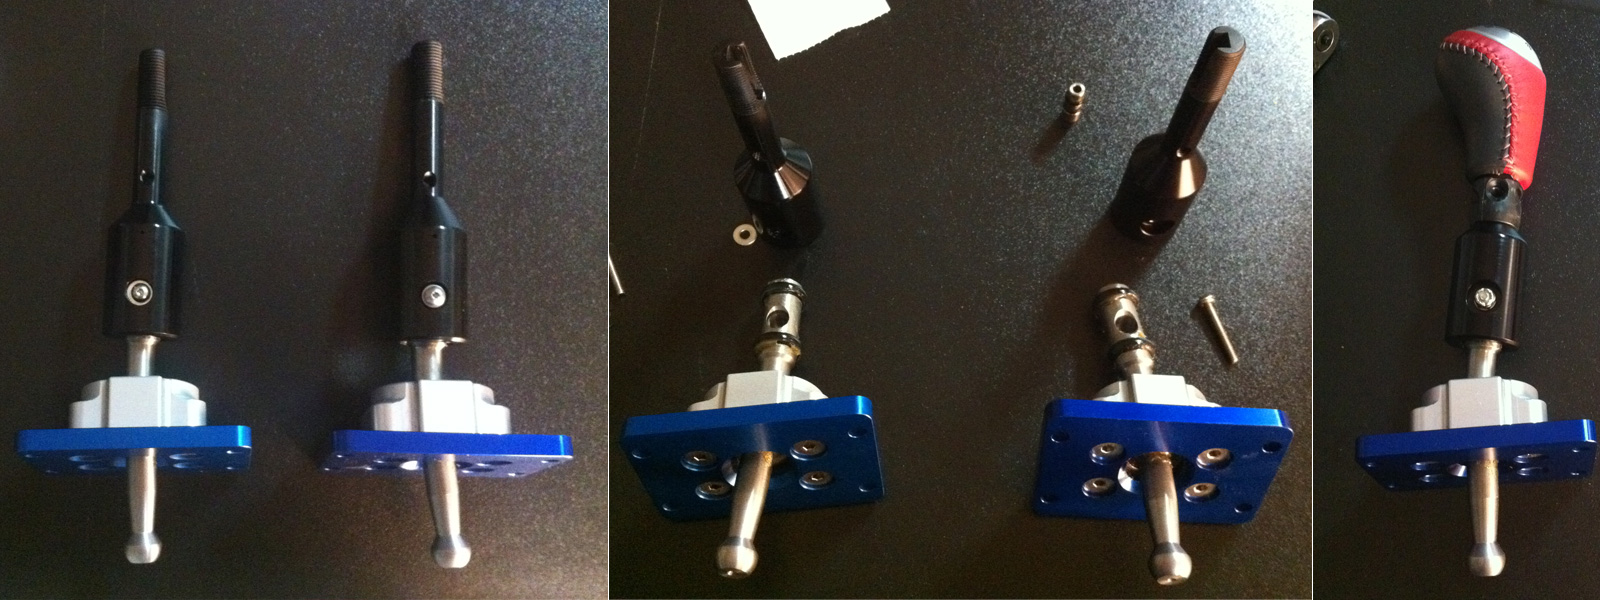
I have actually had a B&M short shifter for a year or so, I just never bothered to put it in since it wasn’t compatible with my ball knob. I had originally considered the B&M shifter and a Hurst shifter, but chose the B&M model because it seemed to have a better design (more closely resembling the stock Z06 shifter).

In any event, I was determined to get the OEM 2008 red & black knob onto my B&M shifter… B&M makes a 2008+ shifter model but no one was able to tell me if the shifter itself was compatible with my 2007 Vette (the transmission was changed on the 2008 Vette so it’s possible the shifters would be incompatible). I did the only thing I could think of- I bought the 2008 B&M shifter and swapped the shafts. Now I have a B&M shifter that I know will fit a 2007 Corvette and will take a 2008 shift knob (visually there did appear to be a slight difference between the two shifters).

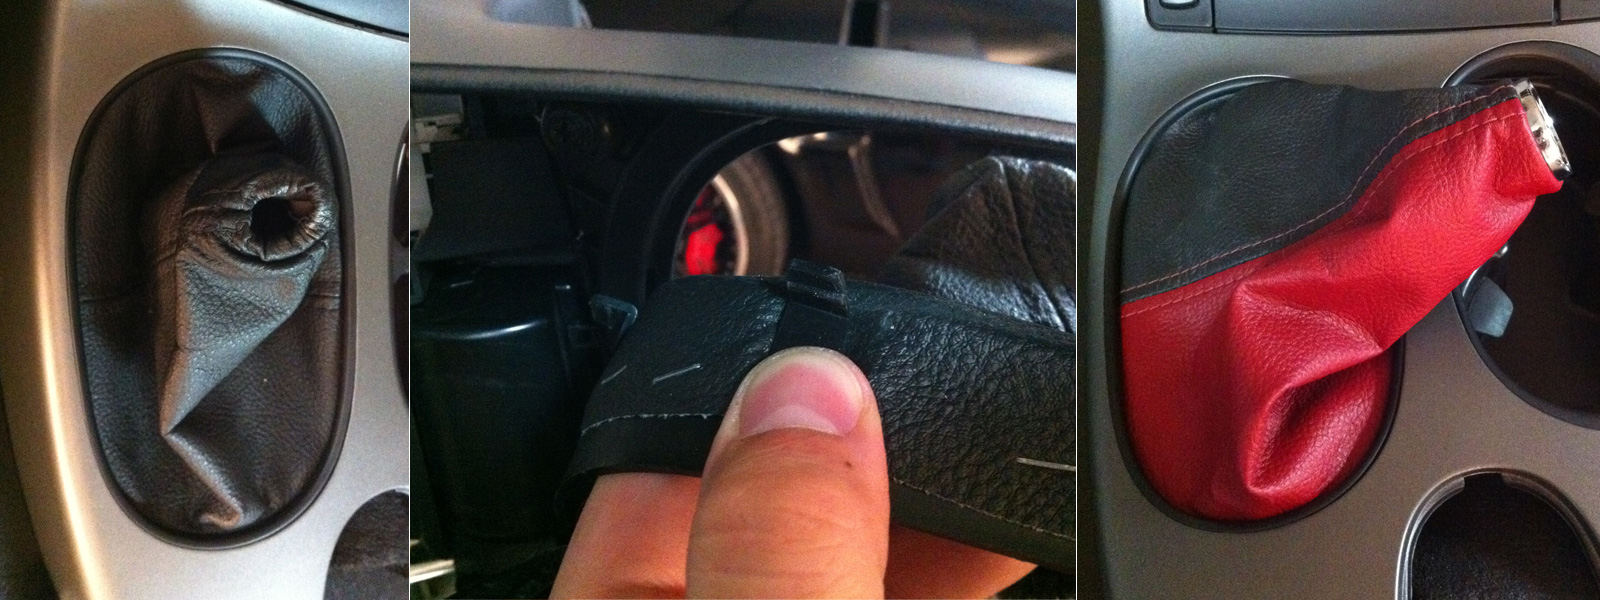
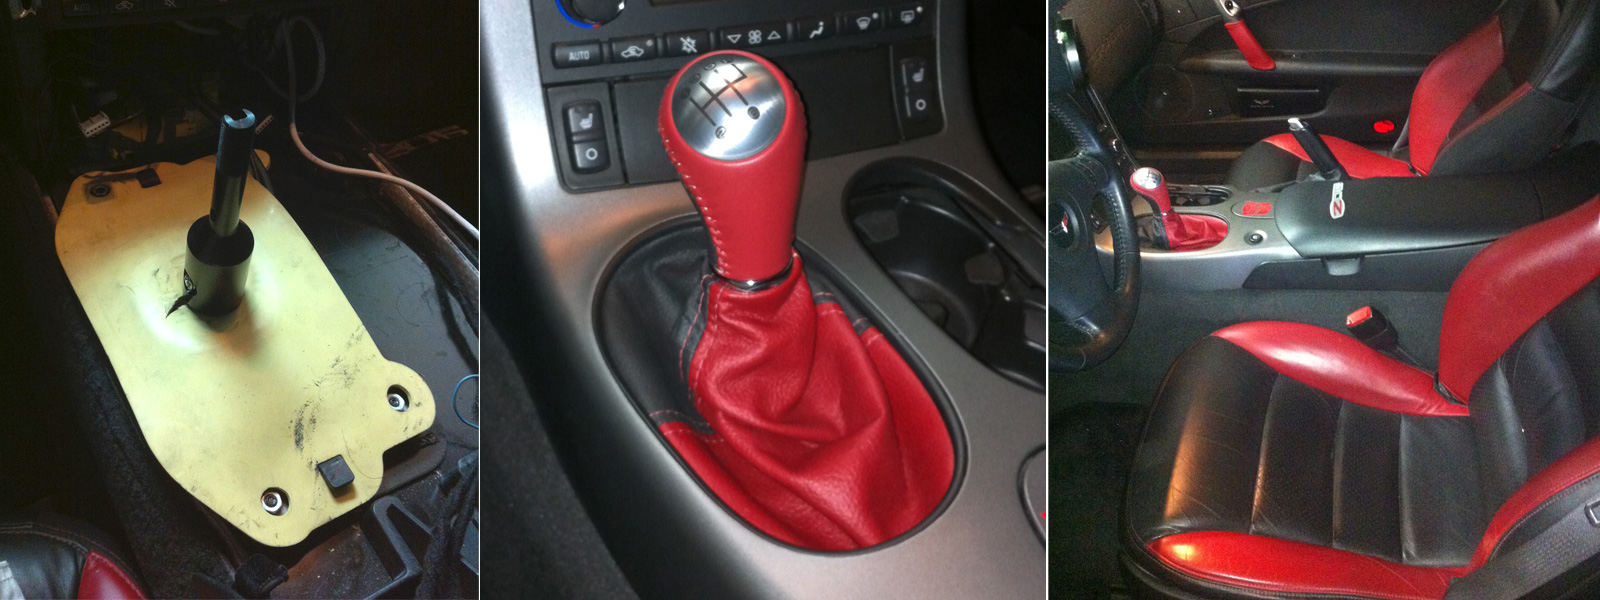
Swapping out the shift boot is cake. It’s easiest if you remove the Corvette center console (which you have to do anyway to swap shifters). The leather boot is attached to a plastic ring with tabs. From underneath you just pop out the tabs from the console. Then pop in your new shift boot. Oh two tone shift boot, how did I live without you?

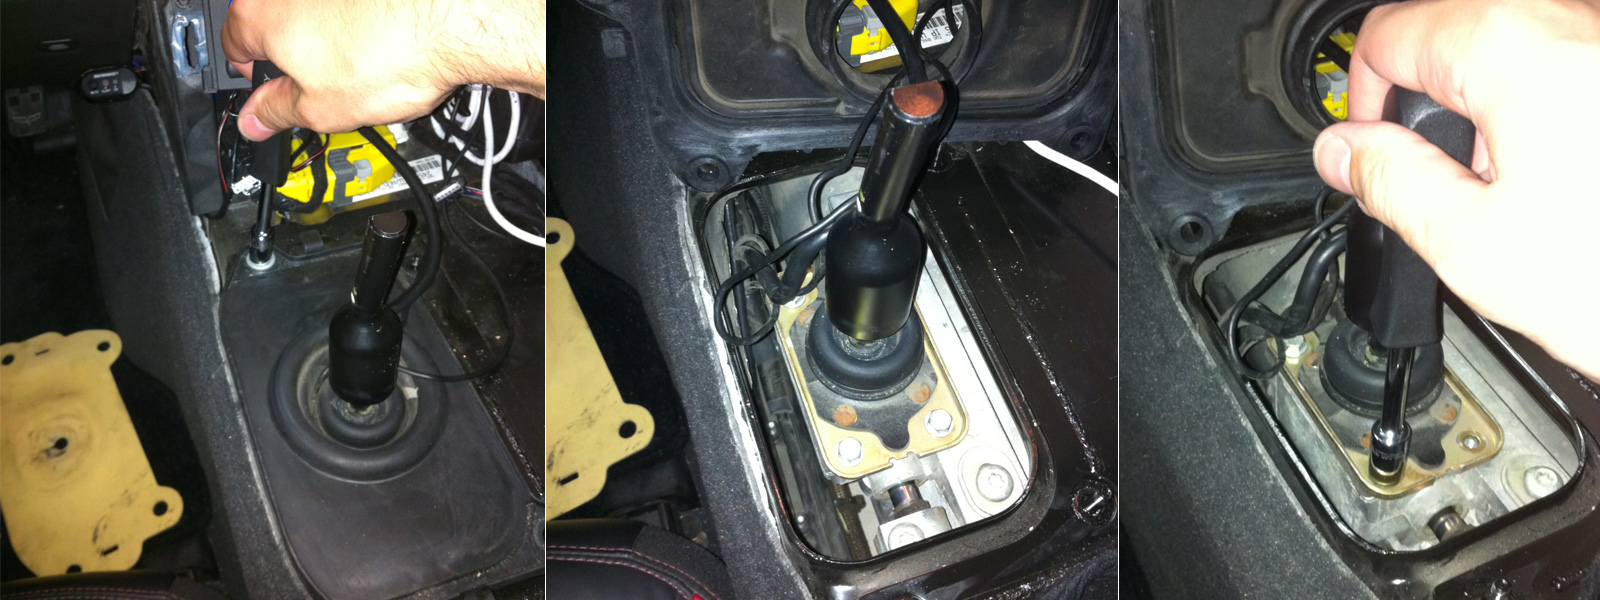
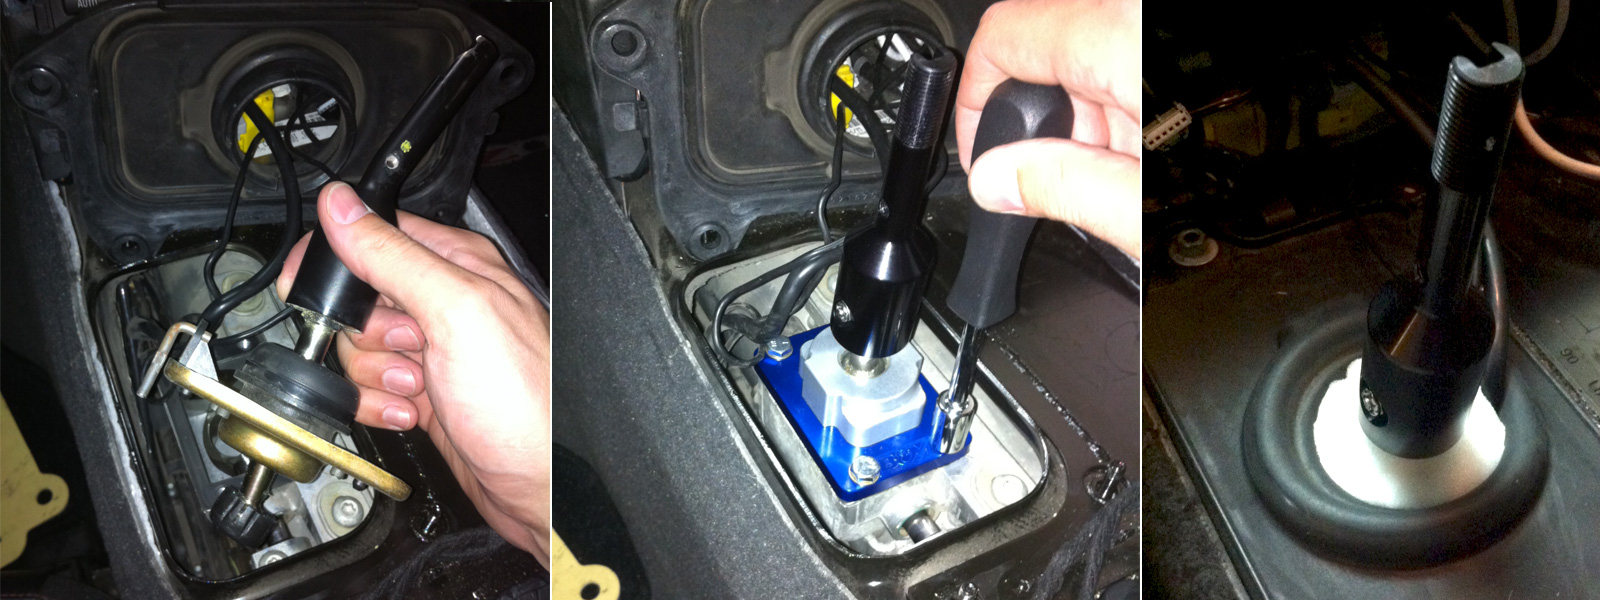
Swapping out shifters is also pretty painless. Once the console if off it should only take about 10 minutes. Just pull off the yellow rubber cover and unscrew the four bolts (3/8) and move aside the black rubber seal (your car isn’t going to have the wires coming out from the transmission- these are for my wideband). Next remove the 4 screws that hold down the stock shifter (3/8).

The stock shifter just pulls right out (put the car in neutral while you make the swap). You need to take the black plastic cap off the stock shifter (pliers) and then pop it on the B&M. Next bolt down (7/16) the B&M where the old shifter was (I left the stock gasket) and put your black seal back on. There are a number of other steps you might need to take if you’re working with a C5 Vette but they are documented in the instructions. Shift through your gears to make sure things are working okay. Since the B&M doesn’t seal quite as well as the stock shifter I used foam to make a sound dampener.

Make sure everything is nice and tight, shifts well and is put back together correctly. Then you can reassemble your console and admire your work [One side note that I didn’t document with any pics- the shifter screw included with the B&M kit is a T-25 and the head was so large I had to grind it down a ton get it to fit over the boot collar]. Personally I love how the new shift boot & knob match the seats and door handle wraps.

B&M 45044 precision sport shifter (Corvette) Review

Now that I’ve used the shifter for a few days I have to say that I’m pretty impressed. The shifts with the B&M are short and crisp. The shifter centers tightly making it much easier to get into third gear, as well. It takes a little more effort to move through the gears but the shorter throw makes up for this hands down. In fact, there’s almost something appealing about the extra force that’s required (especially when using an OEM shift knob). There’s no extra noise from the B&M and vibrations are about on par with my old stock shifter (in other words, very minimal). The stock Z06 shifter is very easy to move, but it always felt spongy and it was too easy to miss-shift. The B&M has and does everything I felt was missing and really makes the car more fun to drive. I would recommend the 45044 to anyone who’s considering it.


Posted by Cam, September 24, 2011

An Even More Awesome 1978 Corvette!!??

I really have to stay off eBay. Yesterday there was that beautiful ’78 Vette. It was a little tempting, but it wasn’t quite what I was looking for. If I could pick the perfect configuration I would have wished for a 1978 Corvette with a manual transmission (the other is automatic) and a black leather interior (the other had grey). Earlier today I noticed another 1978 Vette has been listed on eBay by the same seller as the other car. At first I thought it was the same car but soon realized this was another 1978 model with the exact specs I wanted. Ahhhhhh!

Do I need it? No. Do I want it? Yes. Would I love it? Yes. You just never know when the perfect thing will pop up on eBay. A car like this may roll around every few years or you may never see one again. What to do, what to do…

Gotta let this one slide. As I mentioned in my last post I already have way to much to do and taking care of another car would be a pain.  Besides, if I’m going to spend the money I’d rather put it into the car I already have (is there an LSX block in my future?). Maybe one day…


Posted by Cam, September 21, 2011

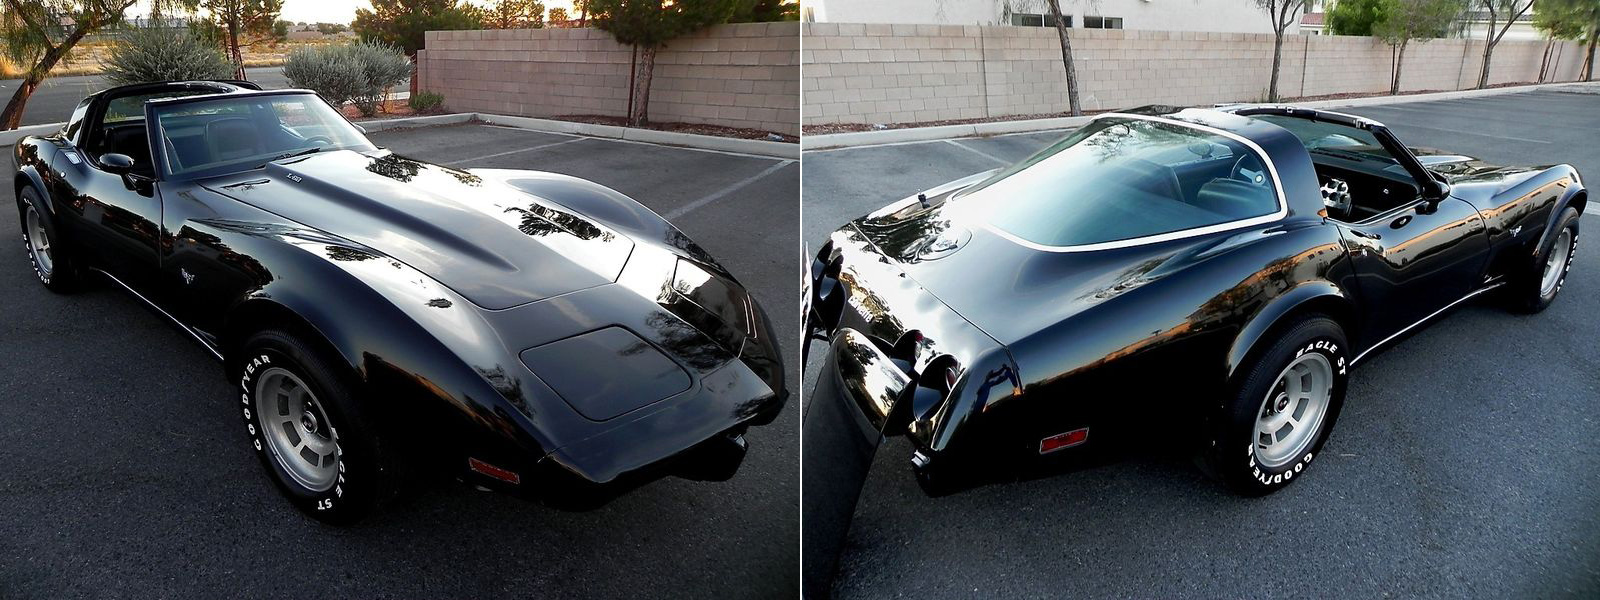
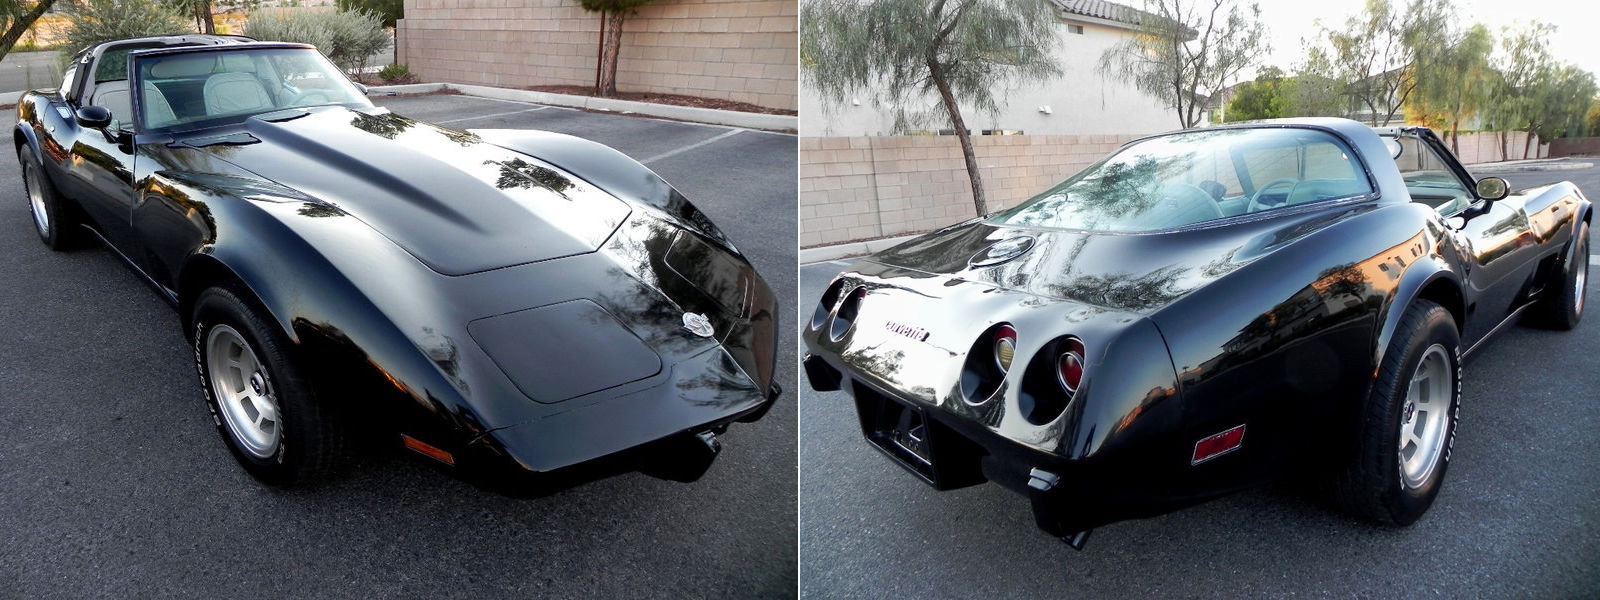
Awesome 1978 Corvette!!

I don’t know why, but every so often I go to eBay and search for Corvettes. In addition to turbo and supercharged Vettes I always look for black 1978 Corvettes. For some reason or another I am hung up on the idea of driving around a car that was “born” in the same year as me.

Lo and behold, I ran across this beauty the other day! I toyed with the idea of getting it (I thought it was a steal at around $10K) but I don’t have any place to put it and I don’t have time to work on it. It sold pretty quickly and I think the new owner is going to have a blast. Anyway, I just wanted to share this awesome ’78 Vette.

Maybe one day…


Posted by Cam, Spetember 21, 2011


Home, Moved & Settled In.

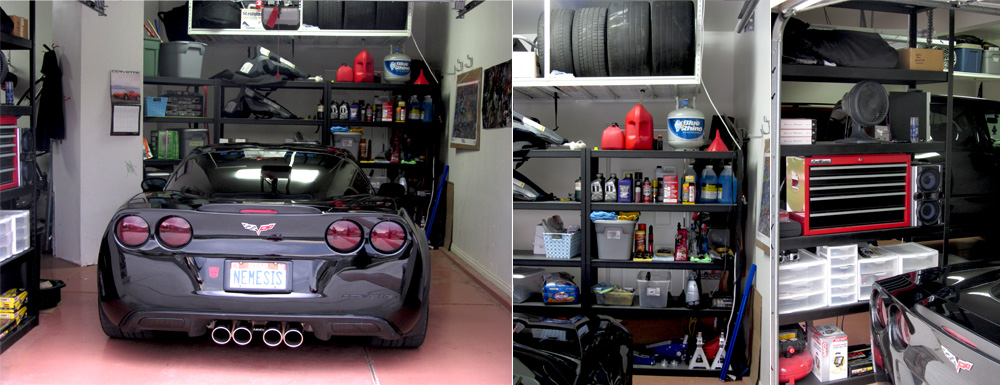
Anyone who has ever moved knows it can take forever to settle in. It’s easy enough to deposit your junk in a new location but finding the right spot for it and creating a good feeling in your new environment can be challenging. Ever since I moved my car back home I’ve been working on getting things in my new location organized. I think I’ve finally done it and consider myself settled.

I spent this past weekend sorting tools, separating cleaning supplies and car parts, adjusting shelves and shifting stuff around until it fit just right.  I was able to put my old set of tires on the storage rack above the back shelf (I don’t swap tires often so it works pretty well). The back shelf turned out really well and I’ve got the shelves organized by car fluids, cleaning supplies and jacks. My side shelf is organized by tools, books and car parts. I crammed in a Sony Stereo & a fan too.  I even hung my old license plates on the wall (yeah, for real). 

I’m really happy with the results. In fact our whole garage is pretty organized these days. Maybe it seems silly, but it brings me a great deal of satisfaction that we can actually fit three cars into our three car garage. I’m often shocked when I drive by houses and see the second or  third car garage crammed with junk (or worse stuff spilling out from every garage). If you have that much stuff get rid of some or get a storage unit. I’ve always felt the garage is just another room in the house and should be kept neat & clean.

Anyway, now I’m home, moved and settled in. Feels good! Now we just have to finish settling into our house…


Posted by Cam, September 10, 2011

Wax On, Wax Off (How to Prepare & Wax Your Car)

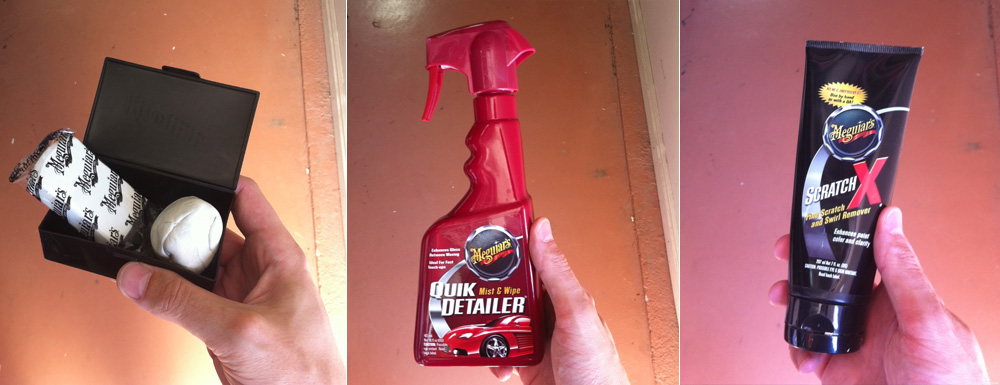
The other day I decided to really clean my car’s exterior. I gave it a quick wash and did a thorough inspection of the body to look for scratches, bonded containments and stains. There were actually quite a few, so I decided to make a quick pit stop at AutoZone. I generally use supplies from a company called Meguiar’s and overall I’m really pleased with their cleaning products (no one has paid me to say this- I wish!). Here’s what I used for my project:

1. Meguiar’s Smooth Surface Clay
2. Meguiar’s Quick Detailer spray
3. Meguiar’s Scratch X 

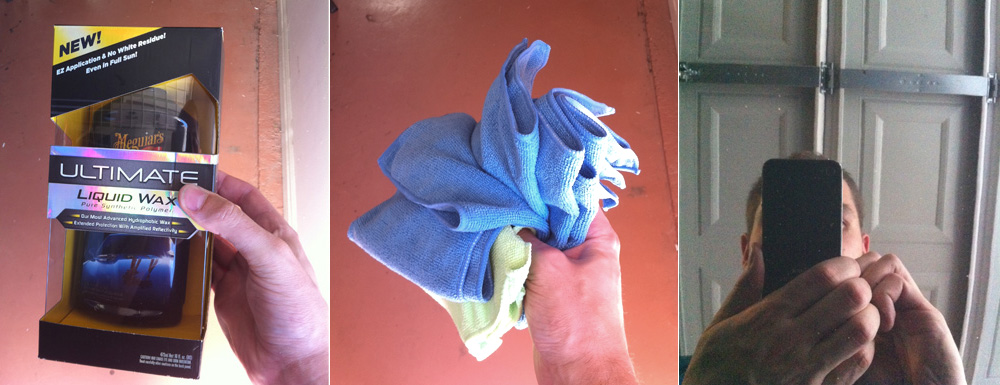
4. Meguiar’s Ultimate Liquid Wax
5. Lots of microfiber towels! You can use cotton terry cloth if you want too, but I don’t care for it personally.
The last picture in the sequence below is actually a reflection. I took the picture with my iPhone pointed and the car to show the finished results. Just for the sake of science I also took pictures in the reflection of my freshly waxed black truck (very little prep work and a different wax though).  No comparison; the rich glossiness of my Vette is unreal.

For the car wash I just go to the local Pay ‘n Spray (that’s not what it’s actually called) and I use their water & soap. I don’t feel like I need to spend big bucks to spray off the road dirt. After the rinse I toweled  off my car and got to work.

I scoured the car for light scratches, stains (bird poop is nasty stuff- it can leave residue that will not wash off), and scuffing. Scratch-X is perfect for this kind of light damage. Just put a bit on the affected spot and buff away.

After the Scratch-X I moved on to the clay. You need to make sure the area you’re working on is lightly lubricated. I sprayed on some Quick Detailer and then rubbed the clay over the misted areas. Clay is cool stuff- it will actually pull out any little particles that have bonded to your car (the stuff that washing won’t get rid of). People may not realize it, but the surface of your car should be perfectly smooth to the touch. If there are any tiny little bumps or any kind of grittiness to your finish the clay will remove them.

After the clay it was time to wax. I like to wax my car by hand and listed to music- I find it very therapeutic.  This was my first time using liquid wax and I thought it was pretty convenient and it applied easily. What I really like about Ultimate Liquid Wax is that it rubs on nearly clear (in other words, it didn’t leave that yellow goo in the cracks of my car). When I went to polish off the wax I got a shock- it took a lot of extra effort beyond what I’m used to. I had to buff it hard in order to get maximum consistency and gloss. Taking it off was more work than putting it on!

But the finished results were well worth it. Proper preparation is essential to achieve the best results.  I don’t think I’ve ever seen my car look this good. But now I have to detail the wheels, engine bay and interior! It must be love.


Posted by Cam, September 10, 2011


The Wait is Over: Apple PowerBook 520C

This is pretty much the coolest thing ever: A fully functional vintage 1994 Apple Powerbook 520C. And it’s mine. All mine!
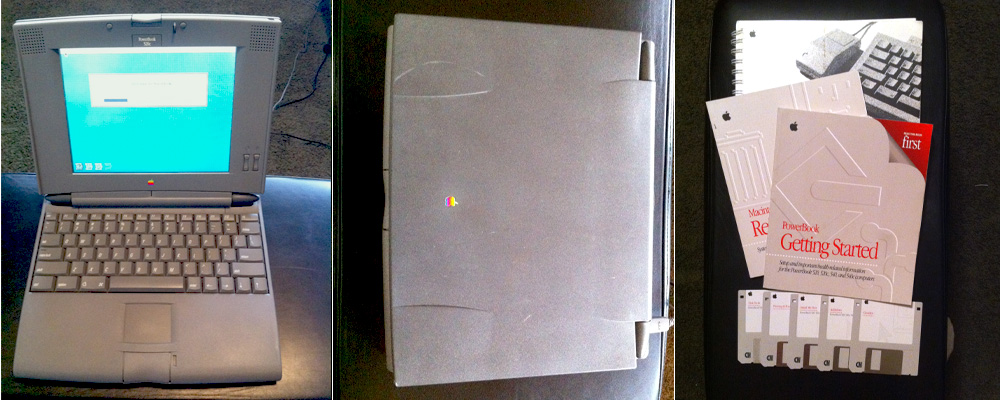
I have always loved laptops. When I was a kid I’d force my parents to take me to the bookstore where I would buy a copy of “Computer Shopper.” One day in the early 90’s while reading the magazine I came across the first Dell color laptop. I knew (knew) that a color laptop was in my future.

Around this time we inherited a Macintosh IIx from my Uncle. I loved that Mac. The interface was simple (remember, people were still using DOS back then), there were awesome games (Prince of Persia) and productivity software (Claris Works). I was totally hooked.

Fast forward maybe a year. Apple released their new laptop line- the 500 series. A Macintosh color laptop- it was my destiny. I bought up every magazine with a review of the 500 series I could find (I actually still have one- you can read the article if you’d like). There were four models: 520, 520C, 540 and 540C. The “C” was for “color” so I knew it had to be one of those two.

The 520C had a dual scan passive matrix screen and the 540C had an active matrix screen. I’d read enough to know that the active matrix screen would be substantially better than any passive matrix counterpart. The 540C also had a faster processor. But the 520C was nearly $1500 cheaper than the 540C and so I decided I’d have to settle for the lower end model. I made many trips to the BYU bookstore to handle the Apple laptops and “test” their trackpads (although standard now, these were a big deal back then).

But my destiny would have to wait. I schemed, plotted and planned but, as a teenager, I simply had no access to the $3000 I’d need to procure the 520C. The model was discontinued in 1995 and a few years later I bought my first color “PC” laptop from a now defunct company called ProGen (side note- I have always used a laptop since). But I never forgot about that 520C…

Years passed and I finally decided it was time to buy the Apple Powerbook that haunted my dreams. I scoured eBay looking for the perfect model. I scoured… and I waited. Years passed. And then I found it. A 520C in good functional condition with all the user manuals and even the installation disks! I knew it was going to be mine.

I placed my bid for $20 and waited for the onslaught of other bidders. But they never came. I scored this beauty for $20 (I’ve seen broken models go for more). Sure I had to wait 17 years, but I saved $2980! Destiny fulfilled.

It finally arrived a few days ago. It was in surprisingly good shape given how old it is. I gave the exterior a good cleaning and then sat down to turn it on. As the screen lit up nostalgia consumed me. It was just like I remembered. The eBay listing had noted the trackpad was finicky, but it worked perfectly. I browsed around the 520C, cleaned up the desktop a bit and discovered a copy of Claris Works was installed! I made sure the disk drive worked and then ordered an 8 megabyte RAM upgrade ($10) and a couple of games that I had enjoyed on the Mac IIx when I was younger (Scrabble & Where in the USA is Carmen Sandiego). I am stoked!

So that’s my story about the Apple Powerbook 520C. I’m delighted that I finally have one. Sure I bought it to satisfy some unresolved emotions, but the weirdest part is that I’ll probably use it frequently. So, one last thing: Who else? Who else has bought something they missed out on when they were younger? I’d love to hear some more stories.

Update: I upped the RAM on my 520C to 12 MB (my current laptop has 8 GB… kind of blows my mind). I also installed Scrabble and played it for a bit (lost). Can’t wait for Where in the USA is Carmen Sandiego to get here.  I’m also looking for a good copy of Sim City 2000. This is living.


Posted by Cam, September 10, 2011