I have been meaning to make this post forever! When I was putting in my stereo I had to take out my center console about four times over the course of the installation. And then I had to take it out twice for the new clutch. During one of the removals I snapped some pictures. A few of them turned out blurry so I’ll redo them next time remove the console (which might be this year- I have a few stereo tweaks that I want to do).
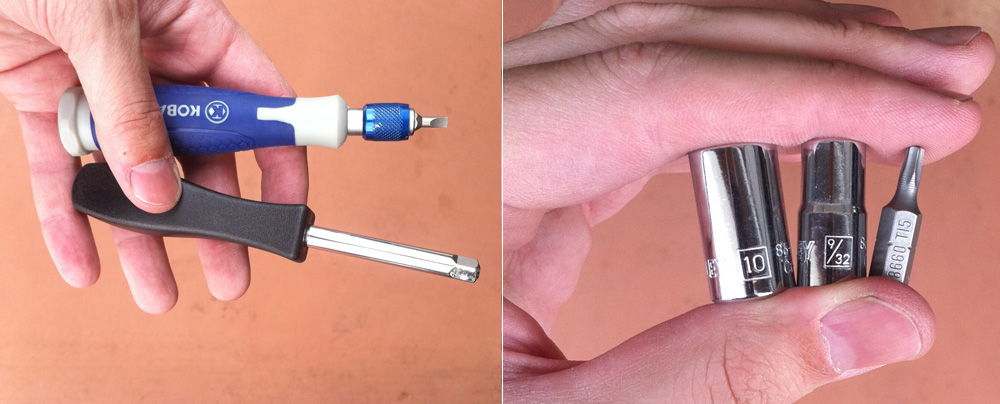
There are tons of reasons you may need to pull of your center console: Access to your stereo, climate controls, shifter, internal wiring, etc. If you want to try it yourself just follow the instructions below (these are specifically for the C6 Z06 but should also work for coupes and convertibles). You’ll need a T15 Torx bit and driver as well as 9/32 & 10mm hex head socket bits andand additional driver. Also recommended is a small flat head screw driver. Be sure to keep all the small parts together (your bits, the removes screws, etc).
I recommend taking off the console cover. It makes it easier to get at some of the screws later and it’s nice to have it out of the way while you work. Unscrew the four Torx screws (Torx T-15) and set the cover aside. Next remove the shift knob (also Torx -15). If your shift knob is stock then just remove the Torx screw as show and pull the knob off (f you have an automatic there’s nothing you need to do- the console simply lifts off over the shifter)
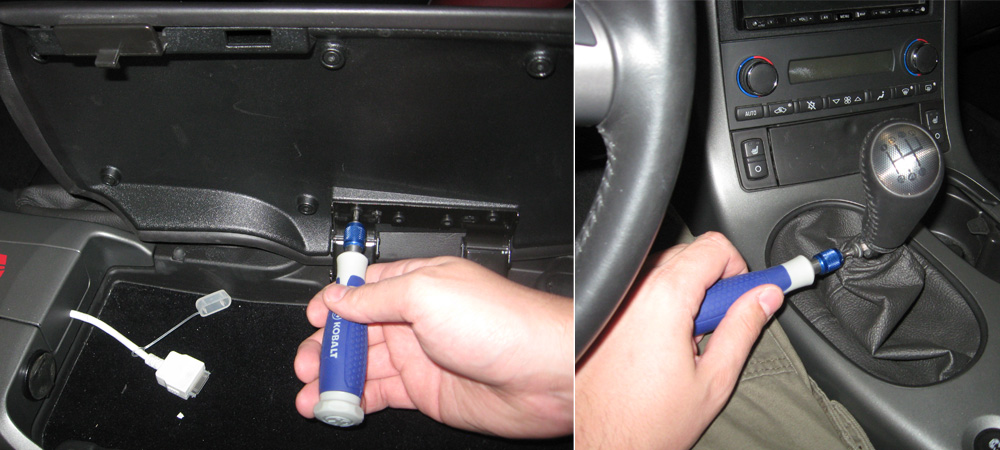
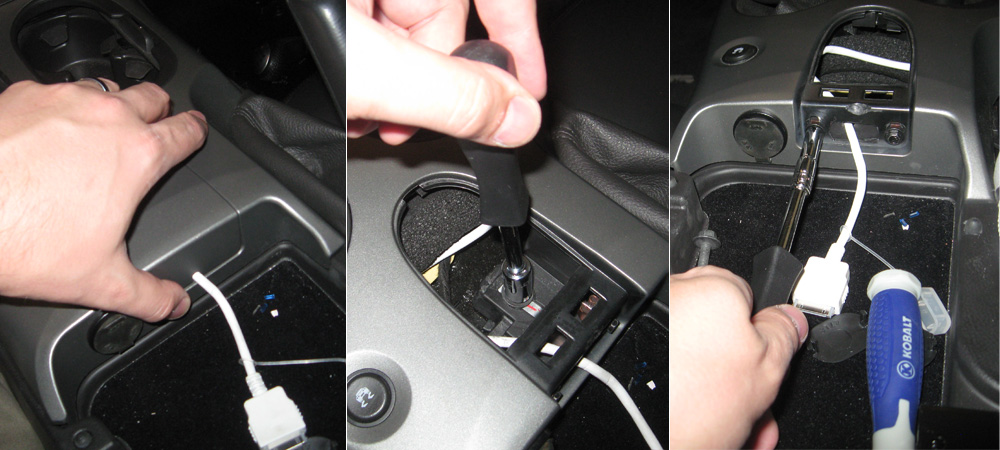
You will need to remove three hex nuts on the console. The first two are near the rear of the console. Simply pop off the plastic covers with a flat head screwdriver and uncrew the nuts (10mm bit). [If you’re not pulling out the main part of the center console you do not have to do this step!]
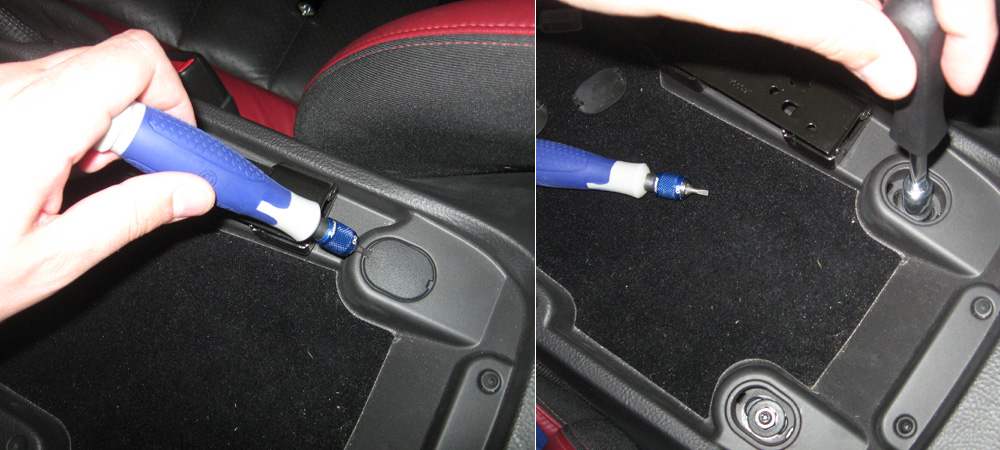
The third hex nut is under the middle potion of the console. Use your thumb to apply pressure on the plastic cover and pop it out (it’s held in by two clips). Remove the third nut as shown. Now you need to remove the two smaller hex screws (9/32 bit) as shown. The white cord you see is for my iPod- you probably won’t have anything hanging out here.
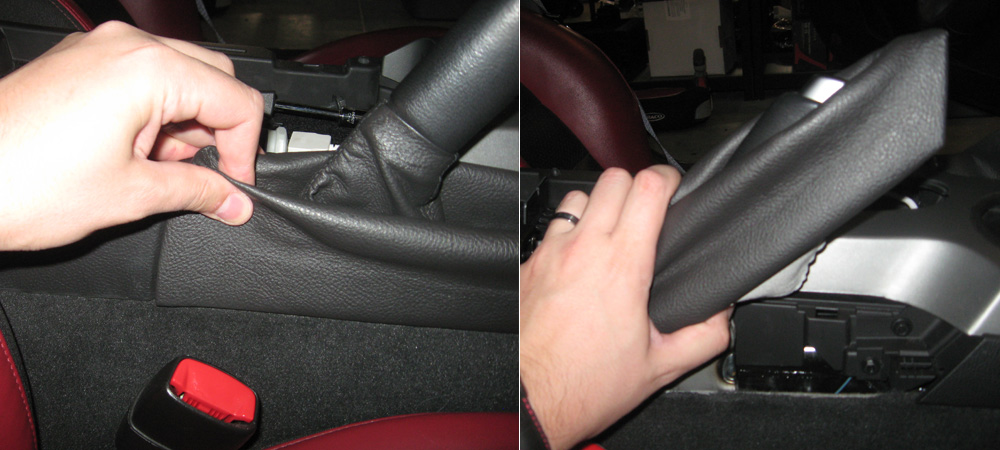
The next step is to carefully pull up the hand break boot. Grasp the boot carefully but firmly and pull it up. The clips that hold it on will release with relative ease. Move the boot out of the way (it won’t come all the way off).
There are two more hex screws (9/32 bit). When these screws are gone you can start removing the piece of trim that runs along the bottom of the console.
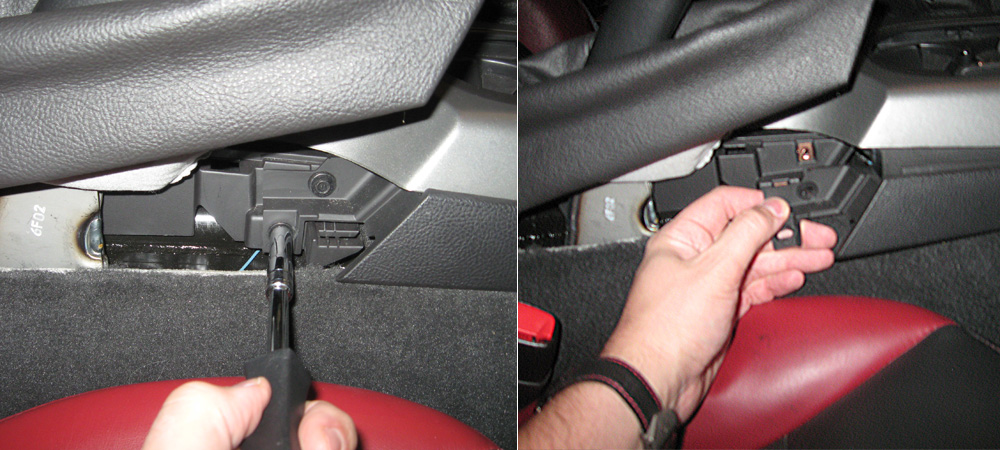
Carefully pull the trim out (you can rock this piece downward a little). Near the glovebox the trim is secured by two clips. You should be able to get a good view of them- they’re pretty sturdy so don’t worry too much about breaking them when you pop the peice out. With the trim removed, slide your hand behind the main console and pull. This whole center piece simply pops out (again secured by clips). Try and work your hand around the console head and pry it out little by little (you don’t want to apply too much pressure to any one area or it could crack).
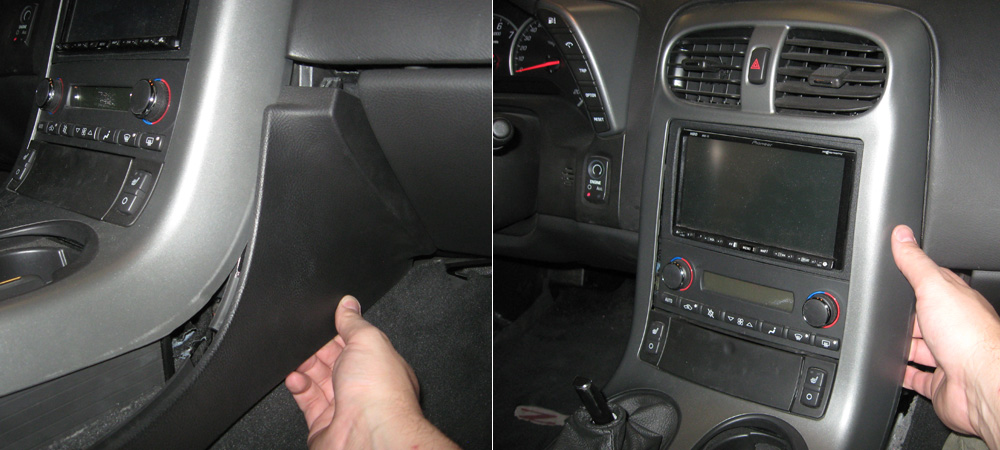
Once the head piece has been pulled out don’t try and lift it off yet! You now have to disconnect the the wiring harnesses. This can be fairly tricky and I confess that I don’t have pictures that show the details of this process. Most of the harnesses have a tab that needs to be pushed down allowing the two halves of the harness to separate. There’s limited room to work but your flat head screw driver should come in handy here (and hey, when you get eveything apart take a moment to bask in your awesomeness). In all there can be up to six harnesses that you need to unhook. 1) Hazard lights 2) Heated seats (two of them, if applicable) 3) Two cigarette lighters, 4) traction control button.
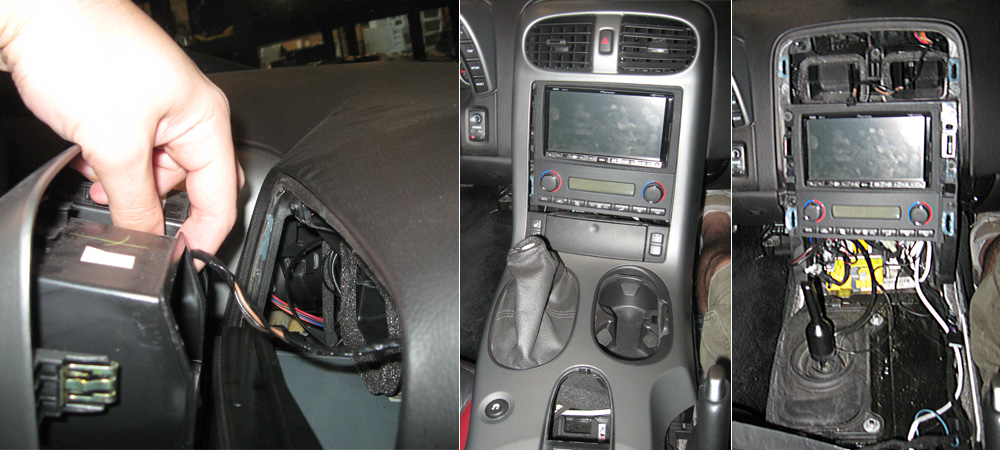
And that’s about it. Once everything is disconnected carefully lift off the whole console (it helps to have your shifter in neutral). And when you’re ready you can put it back on in the opposite order of the way you pulled it off. Remember to hook everything back up (it sucks to forget something). If anyone has any questions or needs clarification on a certain step please feel free to let me know and I’ll be happy to help. Again, next time I do this project I’ll try and replace the fuzzy pictures and even try and get some close-ups of the wiring harnesses. Best of luck!
Posted by Cam, September 5th, 2011


