A Bright Idea (How to Change Your Accent LED)

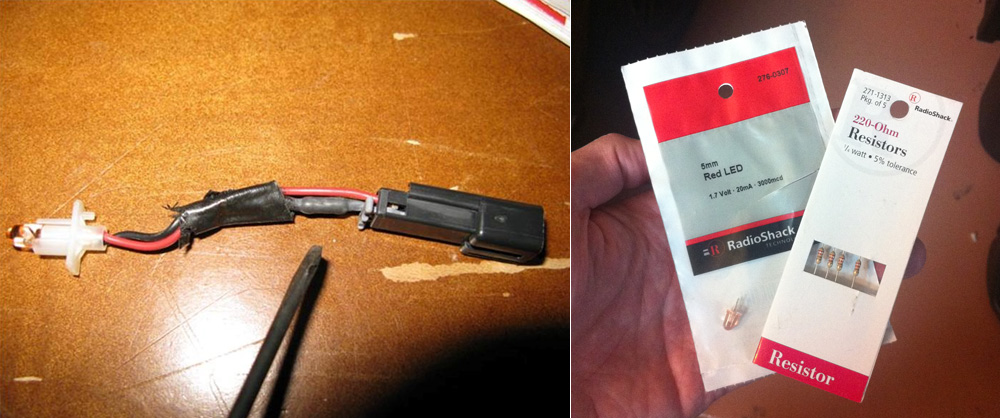
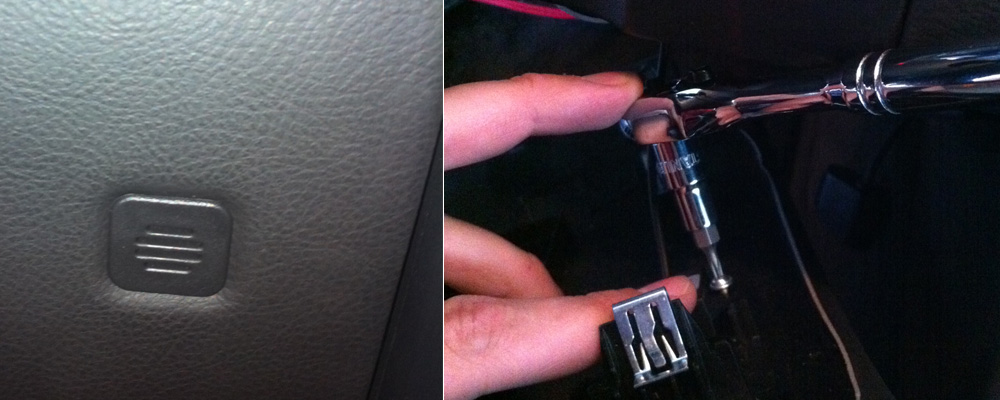
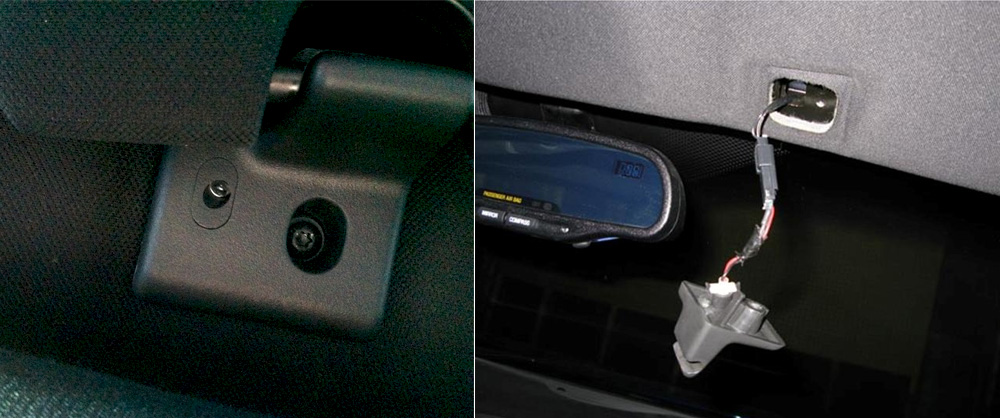
I saw this mod mentioned on CorvetteForum.com and it looked like a fun project. I actually had no idea there was an accent LED!  The light is located on the clip that holds in the passenger sun visor (it’s a super dim orange bulb). Taking off the visor clip is cake. Just use a Torx 15 on the screw and carefully pull out the harness.

Now the fun part: Pick out your new accent LED. You’ll need a 5mm sized LED. You can find these at Radio Shack or online from websites like SuperBrightLEDs.com. LED color choices are plentiful and the accent light can be as dim or as bright a you want. Light output is measured in mcd’s (millacandelas). The more mcd’s your LED has the brighter it will be. For reference I used a red 3000mcd LED from Radio Shack. The bulb simply pops right of the plastic harness. Just cut the contacts on your new LED and pop it right in.

The voltage going into the accent LED (from the car) is about 7.6 volts. Depending on what LED you pick you may need to replace the resistor. You can find online calculators (such as www.led.linear1.org/1led.wiz) to help you figure out which resistor to buy. If you decide to use a new resistor simply snip out the old one and solder the new one in its place. I used a 220 Ohm resistor with my LED. One you make the mods just put your LED harness back in and try it out. If it’s too dim or too bright you can try different bulbs until you find just what you’re looking for.

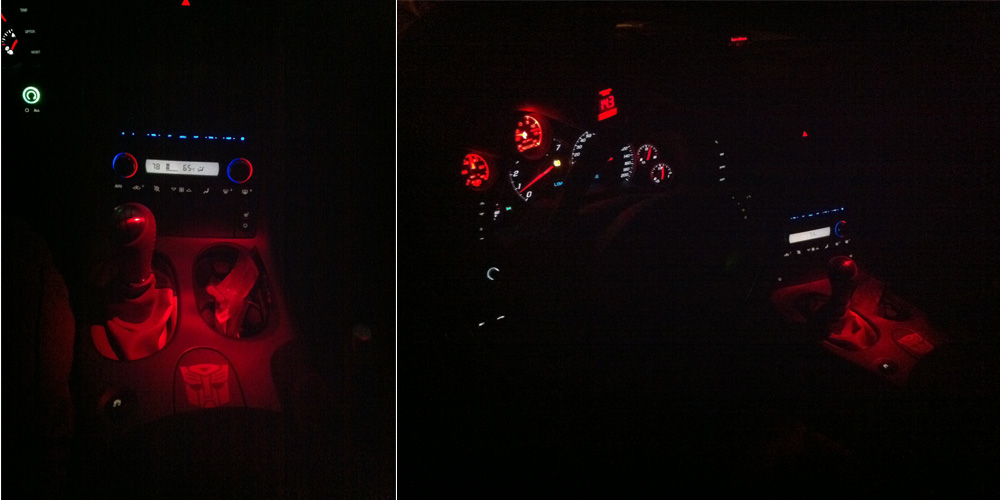
And here is the finished result. My goal was to produce a good amount of red light to illuminate my center console. Overall I’m really pleased. I just put in some Autometer ES series gauges and this is a great way to balance the the red interior lightning. Even though the light is fairly bright it’s not distracting at all. Other people have done blue but I haven’t seen any other pics of red yet. This is the cheapest ($3), fastest (10 min) and proportionally satisfying (9/10) mod yet!

This might be my last post for a bit- we just had a beautiful baby girl and the holidays are coming (I’m in retail and this means way more work). Time will probably be in short supply for the next few months.


Posted by Cam, October 20, 2011

This project was originally suggested by DSteck over at CorvetteForums.com. He posted a great tutorial about how to swap your C6 Corvette accent LED. I used a couple of his pictures here in my blog post (with his permission). The source post has some interesting info that’s not included here so it’s worth a look.

Autometer ES Gauges (How to Install C6 Corvette Gauges)

Once you start down the road of car customization there is no end. There’s always one more accessory, another change, and a quick tweak that turns into a major project. “I’m going to replace my gauge pod… and my gauges… and I guess my whole A-pillar trim and hell, I may as well pull the steeling column panels out and rewire everything since it wasn’t quite right before.” So that’s what I did.

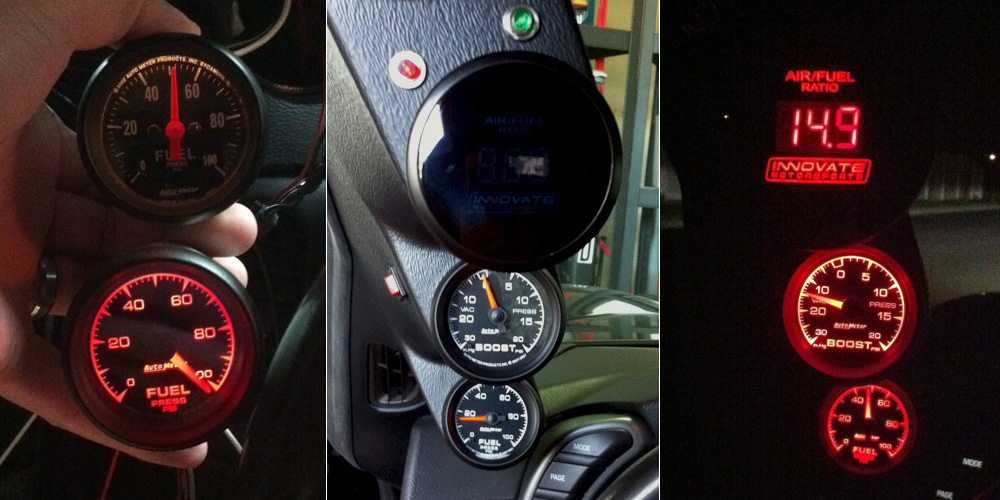
I decided I was sick of the incandescent edge lit Autometer Z-series gauges in my car (and even more sick of the fact that they are wired in such a way that they are always lit).  I really liked the look of the red LED backlit Autometer ES series gauges and so I picked up the fuel pressure and boost models. I think the lettering font on the ES gauges looks much better too and I like the fact that the letters are white when they aren’t lit. The ES gauges also go really well with my Innovate AF gauge.

A Few Installation Notes

My gauge pod was in bad shape from being pulled off several times (warping,  misaligned panel fasteners, extra holes) so I decided to get a new one.  I recommend Speedhut for gauge pods for the C6 Corvettes (both 2 and 3 gauge). They pods are inexpensive, good quality and Speedhut offered fast free shipping. No issues. The extra lights and switch on my pod are for the methanol kit, btw.

If you’re putting in your gauges from scratch then there’s a great document from A&A Corvette Performance: C6 boost and fuel gauge installation  on the A-pillar (as a side note: I got my last clutch from A&A Corvette and they were great). I didn’t have to run the wiring for the fuel pressure or boost gauges this time (I used the old wiring harness & tubing), but I did end up taking off the paneling below the steering wheel to tweak the wiring and I have a few things to add to the A&A instructions.

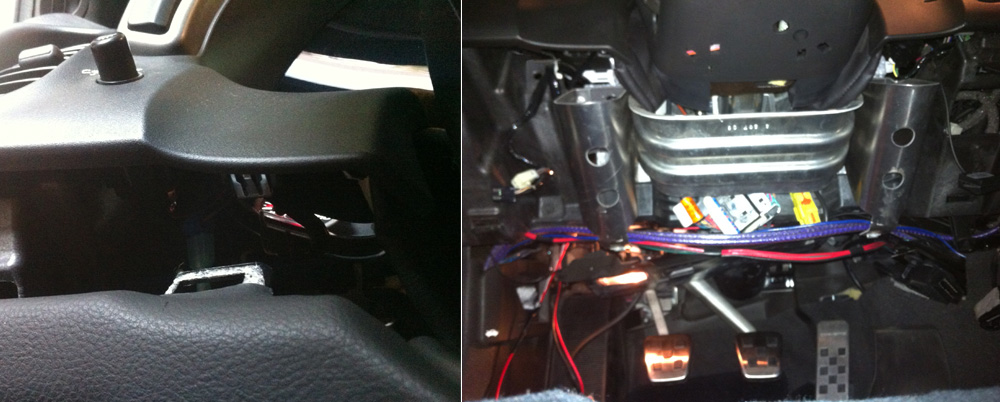
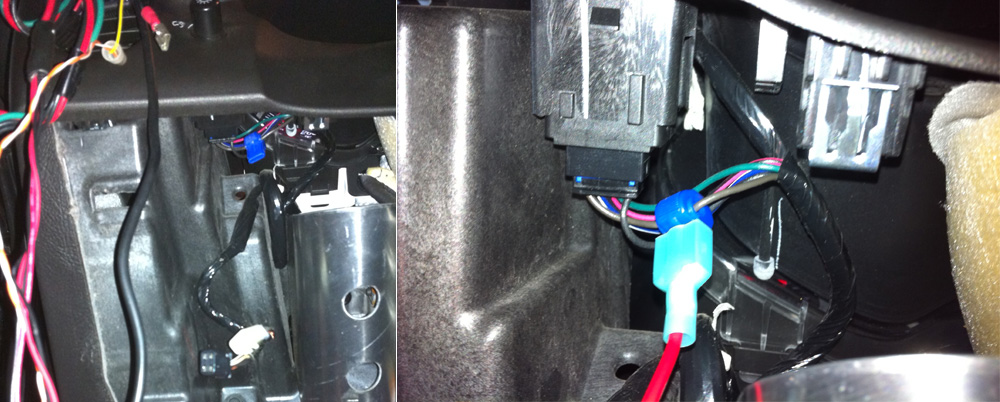
When you pull off the paneling it’s important to note that the bottom panel (below the steeling wheel) actually has a bracket that the dash panel clips into. You need to pull the dash panel out a bit to remove the lower one (left picture). Then just for reference this is what you should see minus the red & purple wires on mine (right picture).

I don’t see a need to remove the ignition button as mentioned in the A&A doc. But you will need to remove the small microphone (left picture).  There’s no harness for this part and the best way I could think to remove it was to use a Torx 10, a socket wrench and and hex head adapter. This will give you the angle you need to unscrews the microphone (you could just prop the panel up on something and not actually take it off but it is more convenient if you remove it).

The dimmer harness is easily accessible from under the dash (it’s right behind the dimmer switch). I don’t think it’s even necessary to pull the harness out. I spliced into the wire and used a T crimp clamp to run power to my gauges (just the power for the backlighting). It is really nice to have the lightning in the gauges functioning with the headlights in the car (I also wired in my wideband gauge to that it dims at night).

Like I said, I didn’t do any of the hard stuff this time around, but I wanted to add a couple of suggestions and pictures from the work that I did do. So there you have it- my pod and gauge swap. And it’s just like the saying goes, “Gauges make the man.” Or something like that.


Posted by Cam Hughes, October 17, 2011

Sticker & Emblem Insanity Post Update

Rocky Mountain Disgraceway

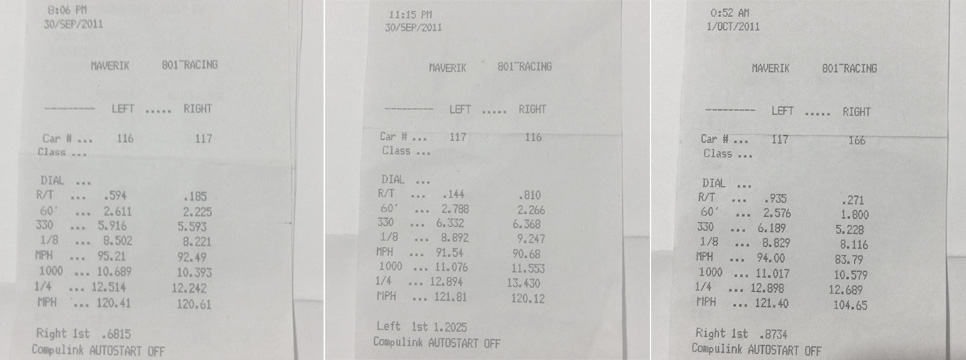
I’m sad to report that the stars did not align. My car was ready, but I wasn’t. As I envisioned my quarter mile time I forgot one critical element: I don’t know how to drive. The realization hurts the ego a bit, but this epiphany is a critical first step toward achieving my goal. I was able to do three runs (I’m car 117):

Anyone who bothers to look at these slips will find a common theme. My 60′ time is pretty bad. Poor launching technique resulted in loss of traction and bogging. I really should have practiced more but I was under the mistaken impression my tires would stick to the track like glue no matter how badly I launched. Operating under this false notion caused severe wheel spin anywhere north of 3000 RPMs. Overcompensation resulted in the car bogging as the RPMs dropped too low. Any 60′ time of 2.00 or less would have landed me in the 11’s.

I was a little surprised to discover that my trap speed was consistently around 121 mph, compared to 131 mph two years ago. Of course two years ago one of my boost reference hoses had fallen off and the car was boosting to 11 pounds in 2nd and 13 pounds in 3rd gear (making it wickedly fast). I still think the car could dip into the 10’s with the current tune though (but not with me driving it).  Next year I’ll hit a few of the test and tunes and try and refine my launch.


Potsted by Cam, October 8, 2011

Announcing Princess Chloe

Three kids didn’t feel quite right. We were pretty sure there was a fourth one just hanging out in heaven, waiting for us to decide we were ready. But three was already a handful and I confess we spent awhile on the fence while deciding what to do.  In the end there was only one real choice…

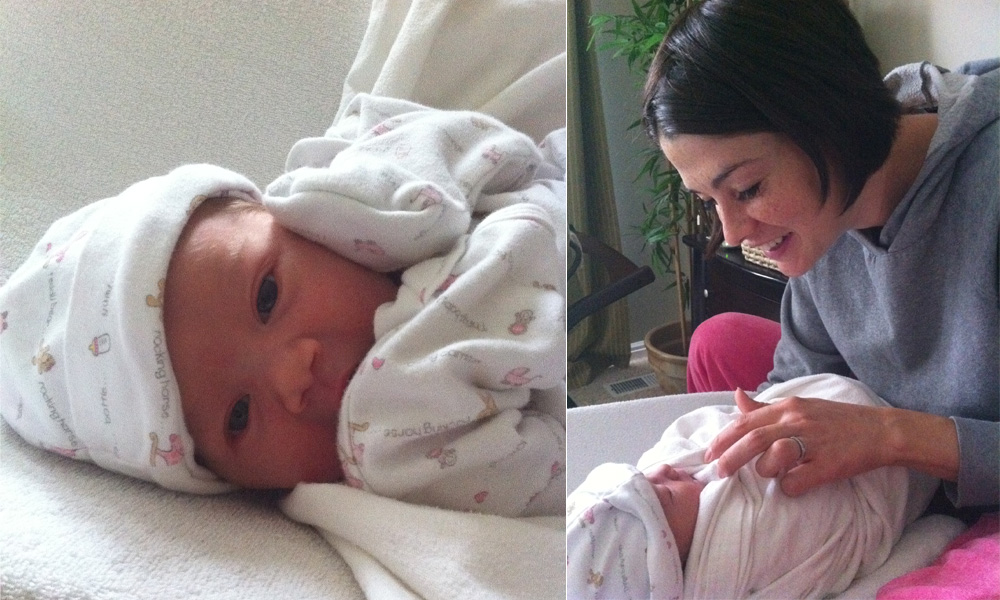
Yesterday (October 6th) at 7:31pm we welcomed little Chloe into the world. From the first moment we met it was obvious that she was always meant to be part of our family. I heard someone say once that you can’t really love a baby- you don’t know them, they don’t know you, you can’t have a relationship with them. That’s wrong. I am her father and she is my child. It has always been love at first sight for all of my children. I am ecstatic that my family is finally complete.

Baby and mom are both doing great! Chole was a little different from Fran’s other pregnancies in that she was about a seven days overdue (although once she was born it was clear that developmentally speaking she was right on time). Chloe also decided to come out face up (posterior position) which makes delivery a bit more complicated. But Fran came through unscathed. We have had our last three kids at home, which – for us-  has made the birthing process more relaxing and less stressful.

For me a new  life is inspiring.  I don’t understand how anyone who sees a birth have any doubt that the process of life is underscored by intelligent design.  And I can’t fathom how anyone could ever think it’s okay to extinguish these tiny lives or harm these innocent children in any way.  Children are precious gifts and they are to be loved, adored and protected. My family is the single most important thing to me. Marrying my wife,  helping to create my children and providing for my family will always be my greatest accomplishments.


Posted October 07, 2011