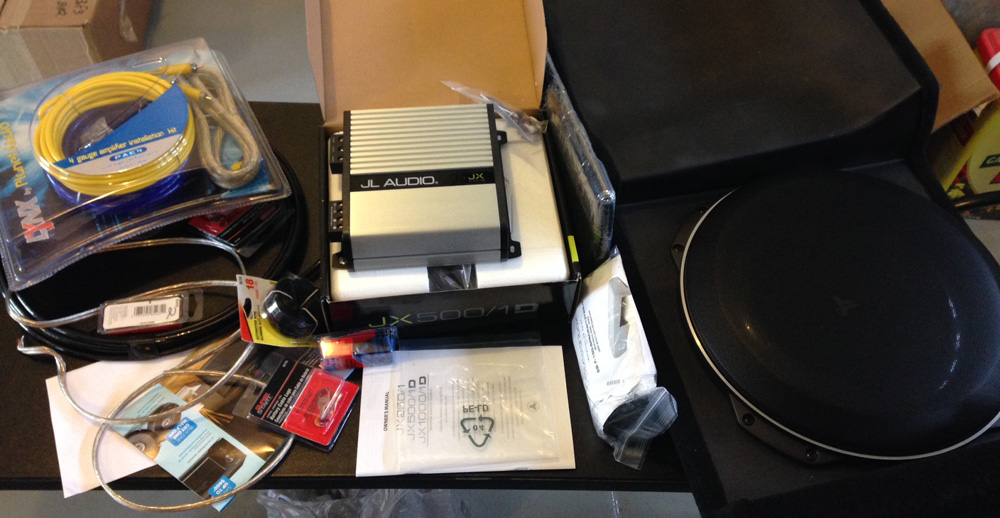
I felt reasonably pleased with the Sony stereo that came with my Raptor (granted, expectations were low) but the stock sub wasn’t cutting it. First I tried a modification that involved filling the sub enclosure with Poly-Fil. While it certainly helped a bit it wasn’t enough. I looked around for more options and eventually decided I’d have to do an aftermarket sub. Behold!
After doing some research I was pretty confident it was a DIY job. Various forum posts suggested install time would be a couple of hours. However it took me much longer (I’m a little obsessive and I seemed to run into a lot of hiccups with this project). There are some good online resources showing how to add an aftermarket amp and sub (like this one) so I won’t go into too much detail regarding the actual install. But I will break down what I got and how well it works.
JL Audio Stealthbox w/ a 13″ TW5v2-2 : I really wanted something “plug and play” and JL Audio’s stealth box fit the bill. The 13″ sub was a little bigger than I wanted as my preference is nice tight bass (I’ve always been a 10″ sub man), but overall it sounds very good, especially given how shallow it is. Mounting was a little tricky (I had to have my wife stand on the box while I screwed it into the floor mounted brackets) but the overall fit is excellent and it looks fantastic.
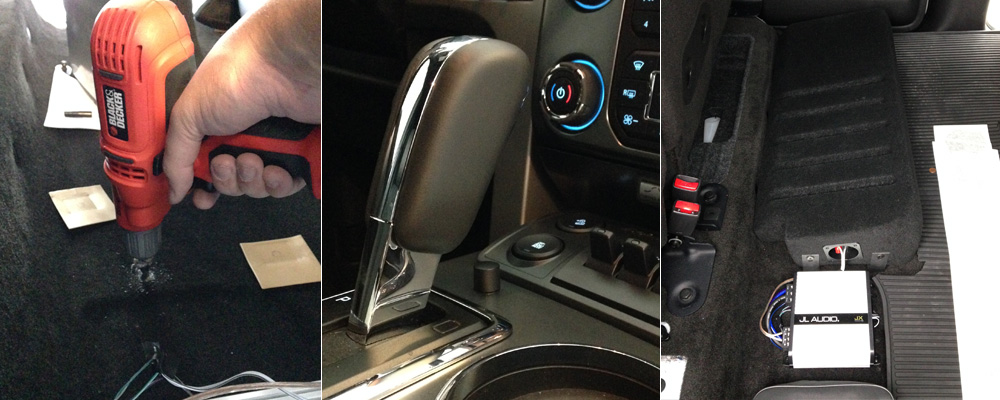
L Audio JX 500/1 & RBC-1 Remote : Small, straightforward and willing to accept hi-level inputs (the signal from the sub wires). I had a JX in my Camaro and it was perfect so I went with one again. I left the frequency filter at 200hz working off the assumption that the headunit is providing a filtered signal already- seems to work well. A remote is important when your stereo doesn’t have an independent sub volume (I think on the JX series the RBC-1 allows you to control the gain). I mounted my control knob behind my shifter (a ridiculously difficult wire run that required the disassembly of the center console). While installing the RBC some of the threads on the remote broke off which was aggravating. I’m glad the remote is a two-piece design so I can replace it later.
AudioControl LC2i : In the end I decided to bypass this. I was excited to use it to turn on the amp, but I ended up just tapping into an accessory circuit wire. Processing your audio signal more times than you have to can’t help so I was just as happy not to use it.
Planet Audio Pak4 Sub Kit : Ehhh. I only needed the positive power cable, remote turn-on wire and the fuse holder (buying the kit was cheaper than buying them separately). It’s good enough, but I would get a different (nicer) kit if I did it again.
Overall things went smoothly (although I ran into some funny hiccups- I’ll mention some of them below and maybe someone else can be spared). The worst part for me was drilling through the truck’s carpet, pad and chassis- there was no turning back at that point! I was pretty meticulous about hiding all the wires and running them in the right spots so that probably contributed to the project’s duration. There is no static when the radio is off (like in my Tacoma), no popping noises (when shutting off the car), no alternator whine and everything works just like it’s supposed to.
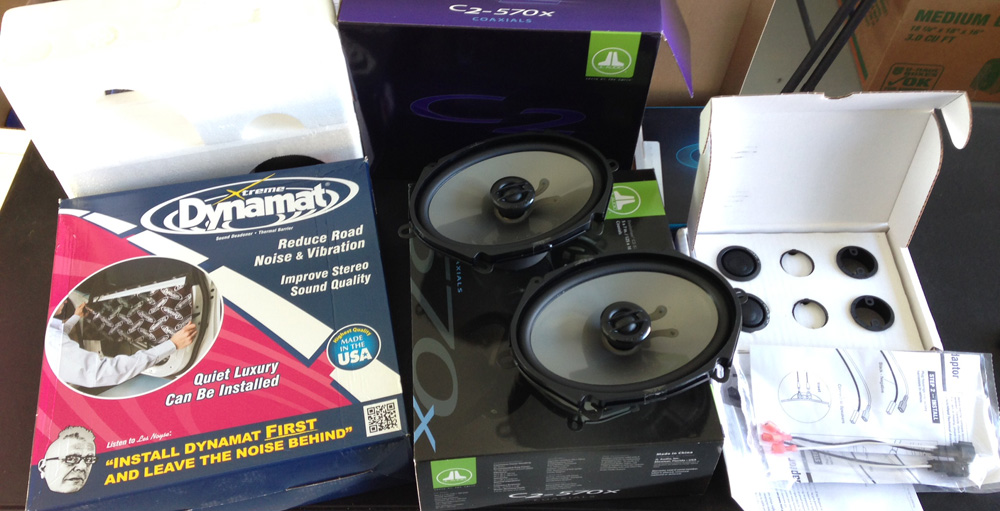
After everything was installed and adjusted it felt like the mids and highs were a bit flat and muddy. The volume seemed okay, but nothing I did seemed to fix the washed out sound. Some people seem vehemently against the practice but I decided to replace the speakers and run them off the of the stock Ford amp. Another round of JL Audio with some Dynamat for good measure.
JL Audio C5075ct: After doing of lot of research I decided against component speakers. Since there’s no simple way to run new speaker wire from the door to the cabin I wasn’t sure how I’d use the crossover (the C6075ct’s have an inline crossover) and I was worried about power requirements of most of the component sets I looked at. These JL tweeters have nice clear detail that was simply missing from the stock tweeters. There was some slight sibilance that I combated by pointing the tweeters toward the dash. Overall they are an amazing upgrade that really brightens the sound up.
JL Audio C2-570X: I bought two sets of these thinking I’d use them in the front and back. In retrospect that was a dumb plan. The C2-570X’s sound great in the back- just the right amount of fill and volume. Sadly in the front the speakers sounded harsh and tinny; they just didn’t produce the mid and low ranges with enough oomph and the extra tweeter was overkill (I would have cut the power to the tweeter if the woofer had sounded okay). I ended up pulling the C2-570X’s out and reinstalling the stock woofer speakers. So much better. The Ford / Sony speakers are not junk by any means and, in my opinion, the woofers sound good with the JL Tweeters (mids aren’t quite right but the highs really compensate). I should have tested things more carefully while doing the install. Lesson learned.
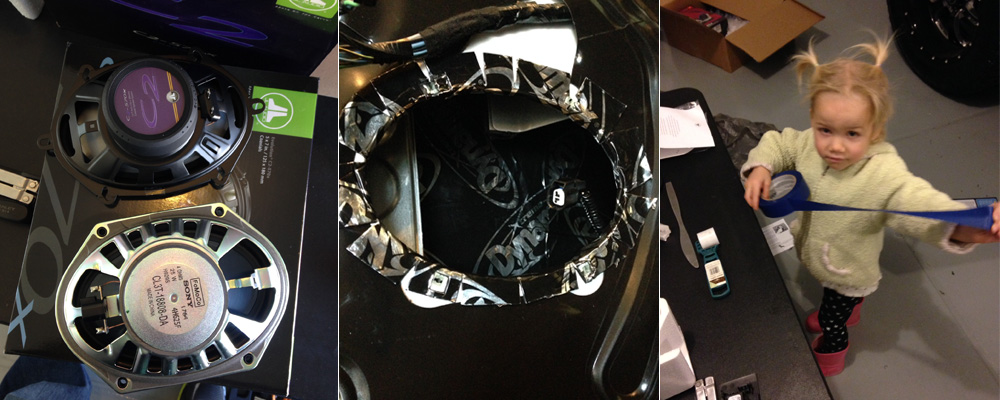
As I put the speakers in I filled the back of the doors with Dynamat and used it to create a cradle. The Raptor doors are covered by thick black plastic so I didn’t end up using the Dynamat as extensively as anticipated. Does it help? I can’t say for sure- it definitely eliminates the hollow sound when knocking on the door. Mostly I just feel cool that I have some Dynamat in my truck.
And check out my cute little helper! She assisted with unpacking the goodies, poked tools into every opening she could find, played with tape, the Dynamat, ran off with my wires and even helped me test and tweak my music (“That sounds good, Daddy?”). I couldn’t have done it without her :).
I would say the with all the modifications the sound is vastly improved. At rest and in motion music (and bass) is plenty loud and the level of clarity and detail is much higher. There is still some distortion at high volumes and I’m not 100% certain the sub is getting a full range signal. Nevertheless I’m pleased with how this stereo has turned out. Each time I have hopped into my truck I’ve thought “Hey, this is pretty good!” One day I will probably go another round (4 or 5 channel amp, something like JL Audio’s Clean Sweep and some better components / woofers) but I don’t feel like there’s any hurry. And given how integrated head units have become with vehicle systems my preference is to keep things as stock as possible.
Install Adventures:
Before bolting the the JL Audio Stealth Box down I decided to test it out. I kept hearing a whistling noise. I finally realized it was coming from the holes in the sub enclosure where the mounting screws would eventually go.
And then I kept hearing a high pitched whine / squealing noise. No matter where I looked I could hear the noise but I couldn’t find it. It took me a few minutes to realize the sound was coming from my flashlight.
When I initially hooked everything up the amp didn’t come on- it looked like it was DOA. My multimeter is packed in a box somewhere and I haven’t found it yet (we recently moved) but I did some testing and was able to determine the amp was fine. Why was there no power? It was a bad ground. The bolt where I’d attached my ground wire was connected to the chassis but it turned out that the receiving nut had a plastic cover that completely isolated it from the metal of the chassis. Geez. Always check your ground.
When I went to put the interior panels back onto the rear doors I discovered that the bolts the hold the panel onto the metal frame had nowhere to screw into. The clip they were supposed to go into had fallen off on both doors. The only reason I even realized there was a clip is because one of them stuck to the magnet of a speaker I removed.
After hooking everything up I reattached the battery cable and fired up the stereo. All I could hear was a static buzz! I thought I’d hooked something up wrong. It turns out that the radio defaults to an AM channel with no signal. Oh boy.
Altogether I would rate this as a fairly straightforward install (especially compared to some of the stuff I’ve done). It seemed like a lot of little stuff went wrong and things took longer than they should have. I completed the install over several days but all told I’m guessing I put in about ten hours. To reiterate though: absolutely worth it.


