Fail Trip: Tail Tip.

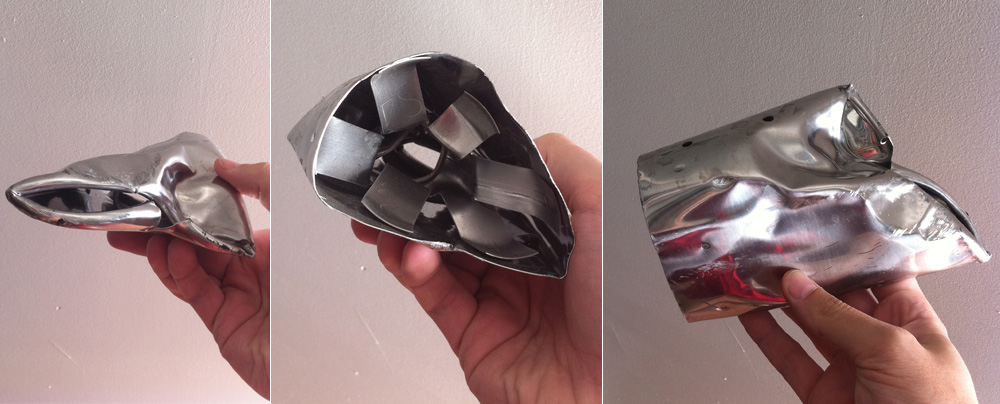
The other night I was driving down State Street in Orem (right across from University Mall, actually). There was something in the road ahead of me that looked like a shoe. The “shoe” was pretty low and I figured it would be no problem to drive right over it. Wrong! As I rolled over it I heard something that sounded like an explosion followed by some terrible metal grinding. At first I thought my tire had blow out but after the initial shock of the noise dissipated the car seemed to handle okay. I made a u-turn and negotiated back to the item in question. I pulled over in the Big 5 parking lot and ran out to grab the offending road debris. Guess what I found?

Yep, someone’s crappy aftermarket exhaust tip. I looked my car over for damage but didn’t see anything out of the ordinary. I’m pretty sure it was already well flattened by the time I took my turn, but in retrospect this piece of junk was not a good thing to roll over. I still have no idea what I heard or what exactly happened. There was no indication of an accident or anything so I assume this exhaust tip just gave up and fell off. Please, if you’re going to try and do a half-ass job of making  your car look nicer at least do a half-ass job of securing your aftermarket mods.

BTW- if you’re the owner and you’d like this back just let me know. I’d be happy to hurl it at your car. Normally I’m pretty laid back, but this experience annoyed me.


Posted by Cam, September 4, 2011

Corvette C6 Z06 – How to Change Your Oil

When it comes to my car I don’t like to take any chances. I do as much of the maintenance as I can myself. So, naturally, I change my own oil. This time I decided to put together a little “how to” guide. If you’re not comfortable working on cars then I suggest you take your vehicle to a competent service center. These instructions are only applicable to C6 model Corvettes (specifically the Z06). Any work you choose do to on your car is done at your own risk. So, let’s get started!

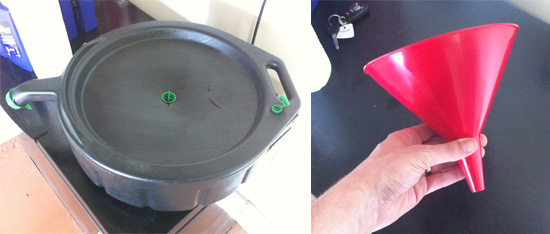
There are a few things you’re going to need. 1) An oil reservoir for used oil (at lest 10 quarts). You can get these pretty much anywhere that sells car care items for around $10. I’ll tell you what to do with your used oil later on. 2) A funnel. I recommend a 2 quart funnel for your oil. These are about $1.
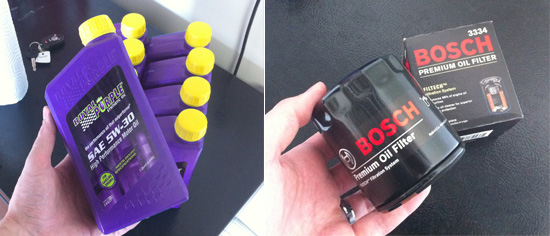
3) 8 quarts of 5W-30 oil (I use Royal Purple). I feel like I need full synthetic w/ my engine modifications but any oil that meets GM’s guidelines can be used. 8 quarts is for the Z06; If you have a coupe refer to your service manual. 4) New oil filter. I just switched to the Bosch 3334 this time so I could use a different kind of filter wrench (more on that in a sec). Anyone competent at a place like AutoZone can help you determine which oil filter you need if you pick a brand other than Bosch.
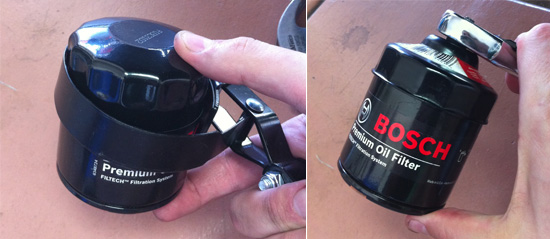
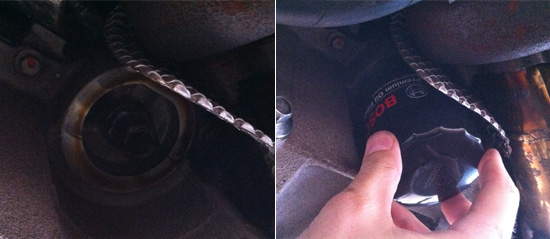
5) Socket wrench with 13mm head. This will be used to loosen the oil drain plugs. 6) Oil filter wrench. The band wrenches are good, but space around the oil filter can be limited (like on a C6) so I switched over the Bosch filter because I can use the attatchment below on a socket wrench and it’s much easier.
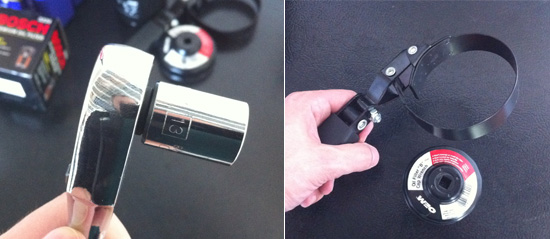
Here are two examples of how the wrenches fit over oil filters.:
7) Rags & paper towel. No matter how careful you are oil is going to spill onto something. 8 ) Here are some optional items you might want to have handy: mallet or hammer & 1 quart ZipLock bag.

So to recap here’s what you need for your oil change:
1) Oil reservoir (at least 10 quarts)
2) Funnel (2 quarts)
3) 8 quarts of 5W-30 oil
4) New oil filter
5) Socket wrench with 13mm head
6) Oil filter wrench
7) Rags
8 ) Mallet or hammer, ZipLock 1 quart bag (both optional)

Please note: This guide doesn’t cover how to lift up your car (see my “How to Lift Your Car” guide coming soon). But you will have to lift your car or have a pit to change the oil on the C6.

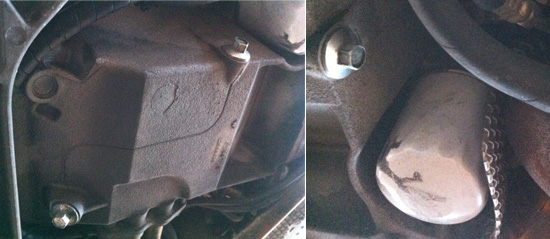
Once your car is sufficiently high enough you need to locate the two drain plugs on the oil pan (there is actually a line with two arrow pointing at them). You’ll need to remove both of them, but you can do it one at a time. Also locate the oil filter (see I told you space was tight). The one shown here was my old Mobile1 filter.
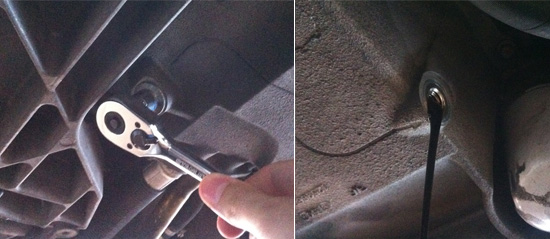
Position your oil reservoir below one of the plugs and loosen it. You may need to tap your socket wrench with the mallet or hammer to get it started. Remove the first plug and let the oil drain out. Remove the second plug and let it drain. Let the car drain until nothing comes out but small drops (usually takes about 10- 15 mins). I’m pretty sure most of the C6 Vettes have a magnet on the oil plug tips (it collects random debris floating around in the oil pan). Be sure to wipe off anything that’s been collected.

A quick lifting tip: I have two car jacks so I usually lift up the front end of my car when I start the oil change. But to make sure the car drains as much as possible I pull the jacks out of the front of my car and then move them to the back. Then I move the jacks back to the front. It sounds like a hassle, but it only takes a few extra minutes.

When the oil is all drained put the oil plugs back. The service manual recommends 18lbs of torque but I just tighten them snugly and I’ve never had an issue.
Next is the removal of the oil filter. Position your oil reservoir underneath (because more oil will be coming out). Using your oil filter wrench loosen the filter a bit and then let the oil drain for a moment. Then you can use the ZipLock bag and put it over the filter and unscrew it the rest of the way (yes, it unscrews forever).  Next you put on your new oil filter (some people fill it with oil, but this is optional). Be sure to rub a little bit of oil around the seal on the top of the filter. Screw it in by hand and then give it a quarter turn with your wrench. Be sure not to over tighten the filter.

That’s it for underneath. Wipe up any oil around the drain plugs, the oil filter and your used oil reservoir. Make sure everything is out from beneath your car and lower it to the ground.
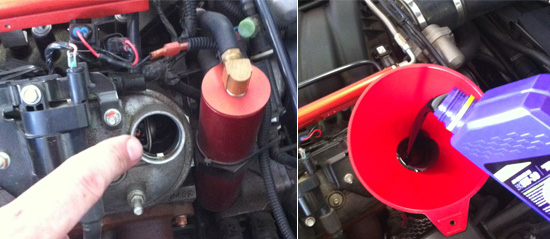
Pop your hood and locate the oil cap (it will say “Mobile 1”). The location varies between the coupes and the Z06. Make sure you’re putting the oil in the right place! Put in your funnel and dump in your oil (some people don’t add all the oil at this point, but I do- in fact I add a little extra since I have oil lines running to my turbos). Remember to put your oil cap back on!

Wait a few minutes and then start your car and let it idle for a few minutes. Keep an eye on your oil pressure gauge and look under the car for leaks. Turn off your car and check your oil dipstick to make sure your oil level is okay.
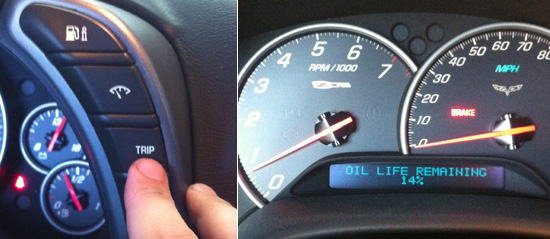
The next step it to reset the oil life indicator. Turn on your car and press the “Trip” button until you reach the “Oil Life Remaining” display.
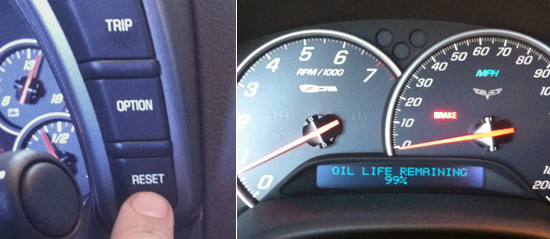
Then just hold the “Reset” button until the display shows “99%” oil life remaining. Some people will always change their oil after 3000 miles, but I wait until I have less than 20% oil life remaining.  For the most part I feel like you can trust the oil life gauge.
You can take your old oil to any AutoZone and they have a disposal unit you can use for free. Make sure to dispose of your other trash in accordance with your local laws. Clean up your work area, put away your tools and thump your chest.

You’re done! Let the smug satisfaction (stemming from the fact that you did it better than they would have done it) wash over you. Go for an “I’m the man” drive (check for oil leaks again when you get back). Taking good care of your car is an important part of Corvette ownership and there’s nothing better than doing it yourself.


Posted by Cam, August 28, 2011

Home Again

The move is complete! Last time I wrote I had the car moved, but there was still a lot of work to do. Now I’ve got all my stuff from work (cleaning supplies, car jacks, tools, boxes, etc) moved to my garage. I confess that I was really concerned about space, but everything fits pretty well. I even have enough room to jack up the car to change wheels,  perform maintenance (i.e. oil changes) and even do washing & detailing.

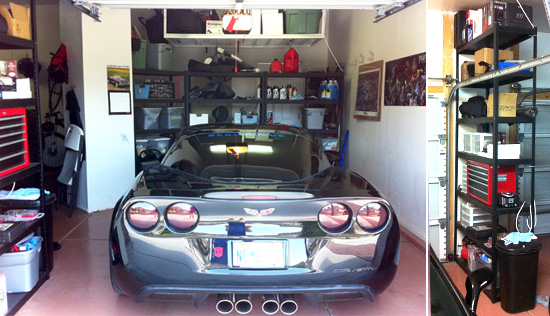
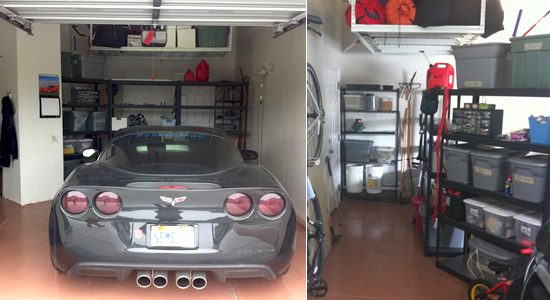
One secret to cramming everything into my garage was the extra space from new shelves. Specifically the black Whalen shelves offered by Costco (about $60 each). Even though they aren’t necessarily designed for it, you can stack them three sections high pretty easily (check out my above pic, right side).  We have a 10′ ceiling in the garage and so that gives me a ton of storage space (space that would otherwise just go unused). That’s right- adding things can make more room.

I also ran power off a plug in the ceiling (the plug for the garage door opener). I used a splitter and ran two extension cords across the ceiling to two corners of the garage for my battery charger, shop vac, air compressor and anything else I might need it for. It was a really cheap/easy way to get power where I needed it.

So that’s it- the move is oficially done (the area at work where my car was is already filleed with shelves!) So far having my car at home has been really nice. I can make quick little trips without having to make a detour over to work to switch cars. Also, it’s nice to have all my car stuff in one place (specifically cleaning supplies). And I think the more limited space will keep my junk level in check and keep me from doing too many uncessary projects too. Now I just have to get things organized and finish settling in…


Posted by Cam, July 3, 2011

Odd Years Bring Tears…

2011. Odd year. By odd I don’t mean strange, I mean it’s not even. Every odd year I need to get my emissions & inspection done for the state of Utah (my car is a 2007 model). No sweat, right? Ha ha…ha…

Safety inspections are no problem. Everything on my car is in tip top shape and I even have legal tinting. I will confess that I have legal tinting now because I had to rip it off two years ago for the safety test. But I digress… It’s the emissions that kill me. If you know anything about OBDII emissions testing you’ll feel for me shortly.

Emissions testing used to be done by literally measuring the emissions output from your car. However, newer cars can actually monitor their own emissions. When you go for an emissions test in Utah they just plug a computer into your OBDII port (usually located under your steering column) to see if your car passes or not. The car has a series of onboard emissions tests that it runs while you drive (checking the O2 sensor, fuel system, catalyst, misfire monitor, etc- it varies from car to car).  If your car successfully runs the tests (you can have one “incomplete” test in Utah) and your MIL (Malfunction Indicator Lamp, also called the “check engine light”) is off then you’ll pass your emissions inspection. If your car doesn’t run the tests or fails them then you have a potential problem. And a quick side note- disconnecting your battery will erase your test results! Don’t change or disconnect your battery right before an emissions test.

My emissions test was due at the end of June. Luckily I decided to take care of things at the beginning of June so I had some time. Anyone can check and see which emissions tests have run or not run. You just need an OBDII scanner tool (you can actually go to an auto parts shop like Auto Zone and they will let you use one while you’re there). I have a mini laptop with a copy of HP Tuners that I can use to see if my tests have run or not. I’d been driving around for the last six months with no problems so I was very surprised to see that every test had an “inc” (incomplete) result. It’s very unusual for the tests to remain incomplete after so long. Just to be sure I did a GM drive cycle to see if the tests would run. Nothing. I racked my brain- it had been two years since my last test when there were no issues. What was preventing the tests from running?

And then it hit me- my tune! I checked pending error codes and found a P0103 code. This particular error code has to do with a malfunctioning MAF (Mass Air Flow) sensor. However, my MIL was off. Generally error codes like was I was seeing cause the MIL to come on. If the MIL is on then generally cars won’t run their onboard emissions diagnostics. I called my car tuner, Marc,  to see if he had any insight.

Sure enough, it was the new tune that was interfering with the onboard emissions tests. Usually cars use a MAF  sensor to determine the right amount of fuel to deliver to the engine. But my MAF just wasn’t up to the task so we switched to a two bar tune using a MAP (Manifold Air Pressure) sensor instead. When you make this change you have to tell the car to ignore the MAF sensor and this throws an error code (the P0103) resulting in the MIL coming on.  But Marc had programmed the car so that when the code was thrown the MIL stayed off (even though the car thought there was a problem).  Net result: The emissions tests didn’t run and weren’t going to run with the new tune. I was going to need an “emissions tune.”

I took my car back to the Marc and he created a new tune that used the MAF sensor (so no error codes). And then it was just a matter of driving until the tests ran. Since this was a “down and dirty” tune the car runs like caca. If you load and unload the engine quickly the car tends to die (this happens when you’re turning or stopping). And there surging issues,  rough idle and jerky acceleration. Luckily it only took two drive cycles to get the emissions test to run (well, all but one; I have never seen my EVAP test run on any of the Vettes I’ve owned).

After the testes ran I got the emissions inspection done, took the emissions & safety documents to the DMV and registered the car, and then took it back to Marc to have the old tune put back on. The car is now registered again, has the old tune and I don’t have to deal with this crap for another two years! Hooray! Sometimes I wish they’d go back to the old way where they just measure your tailpipe emissions… well, no- I’m sure that wouldn’t go well either.


Posted by Cam, July 1, 2011

Helpful Links:

Utah Safety & Emission Info

GM Drive Cycle information

My Car Rocks (How to Get Rocks Out of Your Body Panels)

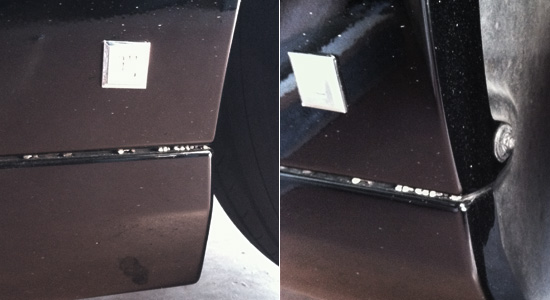
This is a post about rocks. Tiny rocks that get stuck between body panels near the rear tires. If you have a C6 Corvette chances are you know what I’m talking about. I’m not sure if this is a design oversight or if I just live in a place with way too many tiny rocks (and I will state again for the record that Utah roads are awful!). Anyway, here’s a quick little guide to get rid of your rocks so people don’t make fun of you!

The area where I see the most rock buildup is near the rear tires. Rocks actually get shot up over the wheel well casing, into the side wheel panel and drop down, getting stuck between the two body panels. Luckily getting them out is pretty simple.

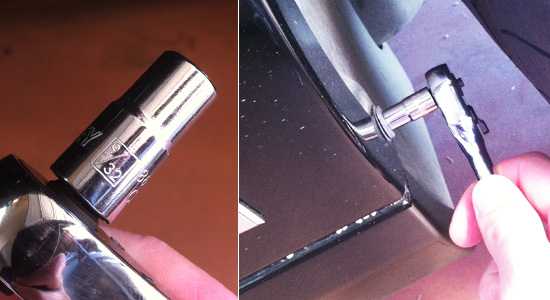
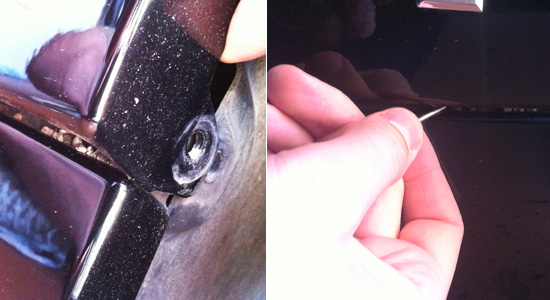
Grab your socket wrench and a 9/32 hex head bit.  Carefully loosen the screw shown (it’s the one opposite the rear wheel) and pull it out.

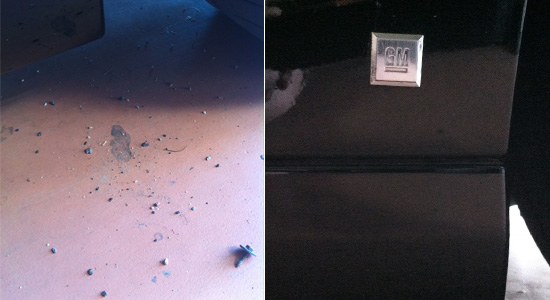
Gently pull out the body panel, separating it from the panel below. This creates a nice gap and you can use a toothpick, flat head screwdriver (anything, really) to carefully push out the rocks.

I usually have quite a few rocks (this is about two months of rock build up and I drive my car maybe100 miles a week). After you get everything cleaned out just push your panel back, put the screw in and voila! Good as new. Repeat on the other side.


Posted by Cam, July 1, 2011

Going Home

For nearly the last two years I’ve had my Corvette parked at work. This was a mixture of convenience (not mine), protection (from my kids) and a high novelty factor (that quickly wore off). As I previously mentioned, keeping the car at work had some serious drawbacks (like the fact that I couldn’t use it very often). But work could use the room, the kids are older, and I need access to my car and so the time has finally come to bring my Corvette home.

My  biggest concern having the car at home is my kids. Behind the area where I would park my car is a door that leads to the backyard. That door is the one that the kids use to go in and out of the house all day (this gives them access to to the mudroom we put in last year). In the past walking by my car seemed to necessitate touching it, scratching it, climbing on the hood and other various forms of torture. So before I moved the car home I had to come up with a way to protect it, just in case. Shelves to the rescue.

After careful consideration I decided I could build a wall out of shelves. The wall creates nice wide walkway to the outside door, a cozy protected parking spot for my car and adds valuable storage space. While I was at it, I moved around some other shelves and our freezer. Overall I’d say the flow of our garage is actually enhanced.

I’m really looking forward to using my car more this coming spring. I just hope the weather improves. It seems like we have rain or snow five days out of every week.


Posted by Cam Hughes, April 09, 2011

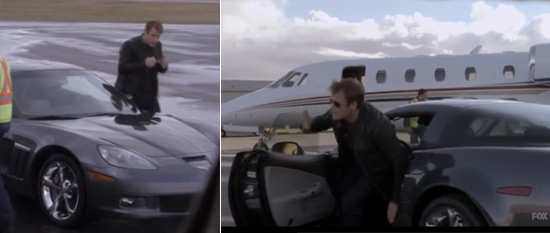
Human Target: Chance’s Corvette

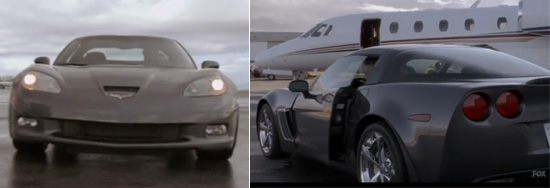
I’m a big fan of Fox’s Human Target. I’d love to give a critique of the show, but that would be a post for one of my other blogs  (that will never get made). Suffice it to say, I was thrilled when Chance pulled up in a Chevrolet Corvette GS (I was getting sick of him driving that Camaro around).

Human Target - Chance's Corvette

At first I couldn’t quite tell what model it was. It looked kind of like a Z06, but it also looked like a coupe. I confess I had to do a quick search online to determine it was GS. I haven’t kept up on Chevy’s upgrade packages lately. It’s a sweet looking car. Even though I prefer black bodies and blacked out rims I can still appreciate this beauty.

Human Target - Chance's Corvette

I haven’t seen too many Corvette’s on TV (at least not on the shows I watch) so this was a nice little surprise. I hope Chance keeps driving it!


Posted on Feb 27, 2011

On the Road Again (How to Remove Your Tires)

I finally got to take Vanessa out of a spin (my car’s name is Vanessa, remember?). We had a fabulous time cruising Utah County and blasting our favorite tunes (I’m only a little crazy). I really wish there were more places where I could drop the pedal and let loose. This car is built for speed and I really don’t get to take advantage of that. Sometimes I think maybe it’s time to get a new hobby… but then I go for a ride and fall in love again.

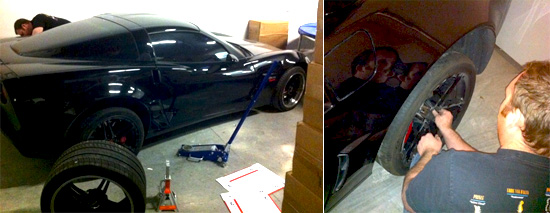
So yesterday I swung by work to help Jim swap his tires (the pictures below are his car, not mine). He’s got a set of Forgeline rims in the back and the leak. Not the tires- the rims. These particular rims are a three piece forged set and the leak is occurring where the pieces are bolted together. Yes sir, with this kind of performance even your rims need maintenance.

Anyway, I helped Jim swap his wheels off. Wheel swapping is pretty easy on most cars. Vettes with tires that are 12.5″ across and that weigh about 40 lbs are a little trickier. Just a quick set of instructions to help all you people who want to change their Vette tires (or any tires).

Items I recommend:
1. Car Jack (low profile)
2. Jack Pads
3. Torque wrench
4. Wrench extender (pictured in kit above- you may need this is your rims have deep lips).
5.  Wrench bit that fits your lugs (size will vary based on what wheel you have on your car).
5. Locking lug key (if applicable- sometimes nice wheels come with a special lug to deter theft).

Steps to remove / change tires:
1. Put your parking break on.
2. Underneath the car about to feet from the rear ties there is an oval hole. You can put your jack pad there or jack directly from this spot.
3. Carefully position your Jack and pump it up until it’s firmly in place, but don’t lift your car of the ground yet.
4. Loosen your lugs. Here’s a great article on wheel lug torquing, including how to loosen and tighten your lugs.
5. Jack the car up until the tire is off the ground. You can use a car jack stand if you can any concerns that your car might fall.
6. Finish loosening the lugs and remove them.
7. Firmly grip the tire and pull it off the vehicle (and remember, you can roll a tire- you don’t have to lift it to put it somewhere).
8. Give you rotor and brake calipers a little cleaning if you want
9. Lift on the new tire, light up the holes with the lug bolts, and refer to the torquing guide above again.
10. Remove you jack lift (if applicable), lower your car and repeat on the other side.
Remember: after you drive you car 50-100 miles you should tighten the lugs again!

Just in case you’re curious about why you’d be removing or changing tires, here a few good reasons:
1. You’ve got one set of street tires and one set of track tires and you need to switch them.
2. You’ve got a flat and you’re putting on a spare
3. Wheel maintenance (tire, rim, TPMS, etc).
4. Assembly maintenance (breaks, calipers, rotor, etc)
5. Left / Right tire rotation
6. Because you’ve got a sick idea of fun.

Anyway, now that the weather is a littler better (could we do something about these roads? They are awful!), batteries are charged and wheels are swapped maybe you’ll see us on the road again.


Posted Jan 30, 2011 by Cam Hughes