Sideshow Statues: Transformers & Star Wars

For my fortieth birthday I got myself statues from Sideshow (what else would a forty year old want?). Being an adult is awesome.

First up is this Boba Fett:

Next are three 80’s style robots (Optimus Prime, another Optimus Prime and Voltron):

It’s true that you can’t really play with statues. But you can’t play with toys you leave in the box either. At least I get to take these out of the boxes and display them! All of these are limited edition productions and are available from Sideshow.com at the time of this posting.

Netgear Orbi – Making a Mesh

We have long struggled with Wifi in our home. There are a few elements working against us: 1) We have 3.5 levels and a lot of space to cover. 2) Part of that space is an excavated portion of the basement where nary a wifi signal can penetrate. 3) Part of our space is a main floor office which, for reasons unknown, is wifi Bermuda Triangle 4) We need Wifi in our garage for various devices and this exterior area has been difficult to cover as well.

In order to get internet to the nether regions of our home I had previously set up three separate networks (Seriously? How sad that your nerdy friends didn’t rescue you…). The basement & excavated area had a NightHawk X6, the office had its own NPowerLINE Wi-Fi 1000 and the upstairs had a separate NightHawk X8 which also covered the garage. Things mostly worked but the setup made it hard to share printers, seemed to confuse devices (they often switched networks or disconnected altogether), made it hard to lock down the internet (i.e. parental controls) and made certain aspects of home automatic difficult to use if you were on the “wrong” network. I knew I needed to eventually fix the problem (Sonos connect amps with 3 networks? Uh… no) but there was so simple one router solution. I dreamed about having some kind of mesh network but my ability to set one up was much too limited to undertake a project like that. And so I waited. Until one day…

ca

…Netgear released the Orbi. Billed as a “mesh network” system (slightly misleading) the Orbi consists of a Router base and satellite nodes. The base establishes a link with each satellite and they create a relatively seamless “mesh” network (it’s a hub and spoke system but as far as your devices are concerned it’s all the same big network).

I opted for the 3 node system which is billed as covering 8,000 square feet (I don’t have nearly that much space, but you can’t have too much Internet, I say). I positioned the base in our mechanical room next to our cable modem- that was the easy part since I didn’t really have a location choice. However, you have to position the satellites within reach of the base so I had a few placement mishaps on that end. Eventually I ended up with a node in the basement by the excavated areas, one on the main floor across from the office (inside the office was a disaster) and another in the center of the upstairs (in a bedroom).
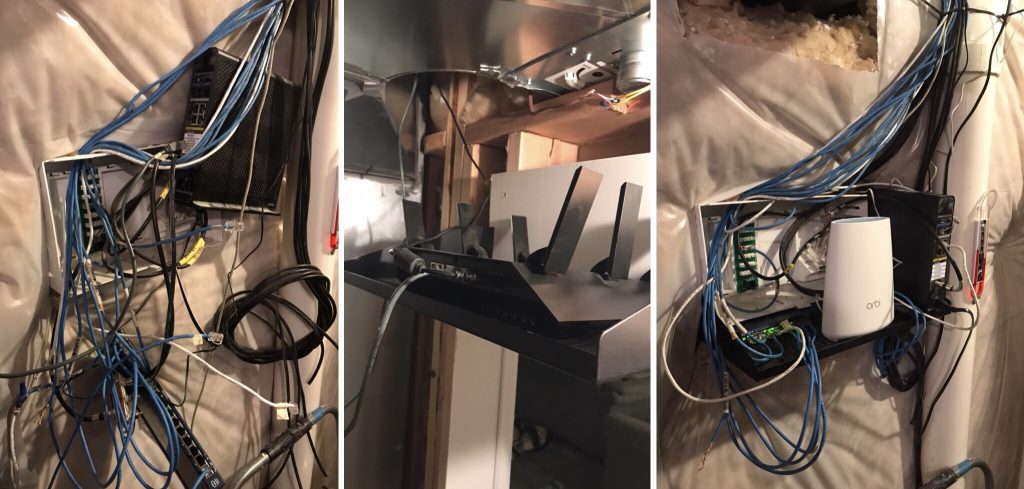
Side note: Our network “infrastructure” was a complete mess (“So wait- you have a router plugged into a switch that goes into another router and then into your modem?”). When I installed the Orbi I took the opportunity to organize and simplify things quite a bit.

I spent a lot of time wandering around making sure that every nook and cranny of the house had acceptable internet. Speeds are much faster now and, based on a few days of use, much more reliable / stable. We may benefit from an additional satellite in the future (it looks like people are using up to four satellites) but I think for now we’re covered (nerd pun!).

We were hoping to implement Disney’s Circle, which was offered with the Orbi system. However, there is an Orbi firmware issue and the current stable version is not compatible with Circle. No word on when that will be remedied. It’s really too bad because the Netgear parental controls aren’t great (they suck). That being said we can still use the Orbi app to turn internet access to devices on an off which seems like it will be useful.

Overall, I’m pretty happy with the Orbi system and feel like it’s been a great (and desperately required) upgrade. Hopefully it’s smooth sailing from here on out.

Update: 4/13/2018 – Having now had the Orbi system for a week I can say that computer connections periodically drop for no apparent reason. I’m wondering if it has something to do with the computers switching to a different satellite. It may also be an issue related to Parental Controls that I tried to set up (it was a mess- I turned them off but I’m wondering if I left something misconfigured). Such hassles.
Overall: 8/10 (dropped connections)

Update: 5/23/2018 – The Orbi system has turned into a bit of a liability. Nodes randomly lose base connection and Internet. Devices attached to the network are randomly booted. Internet speeds are wildly inconsistent. I can’t find documentation or information to remedy these situations. I think we’re moving back to our old routers. Sigh.
Overall: 4/10 (suckville)

GMG Lowering Springs Installed! Porsche 991

I’m doing this blog post before I make a YouTube video this time. A lot of my posts these days seem pretty lazy to me. I just pop up a video and blurt out a few thoughts after the fact. Back in the good old days (when I didn’t make videos) I feel like my posts were a bit more thoughtful. That’s what I’m going for here.

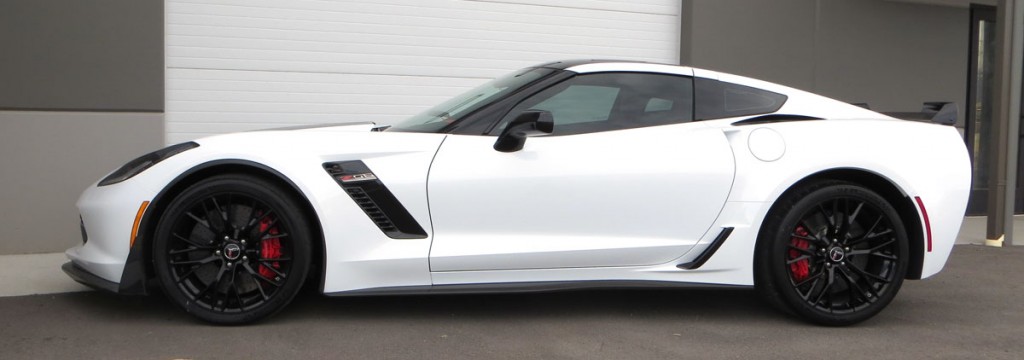
When I had my Corvette I remember one of the things that really bothered me was the wheel gap.It was such a big deal to me that I contemplated spending about $3K on drop spindles (not including any installation costs). You can drop a corvette up to a 1/2″ on the car’s stock lowering bolts but knew I wanted to go at least an inch. Of course that didn’t matter because I ended up selling the car long before I got around to any mods like that.

Quite a wheel gap you have there!

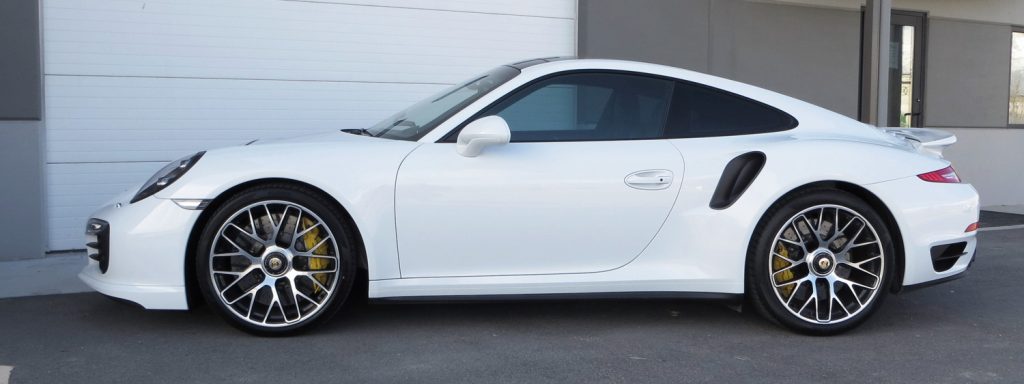
When I got my 991 the wheel gap wasn’t large enough to demand my attention. I had lots of other things to do first…

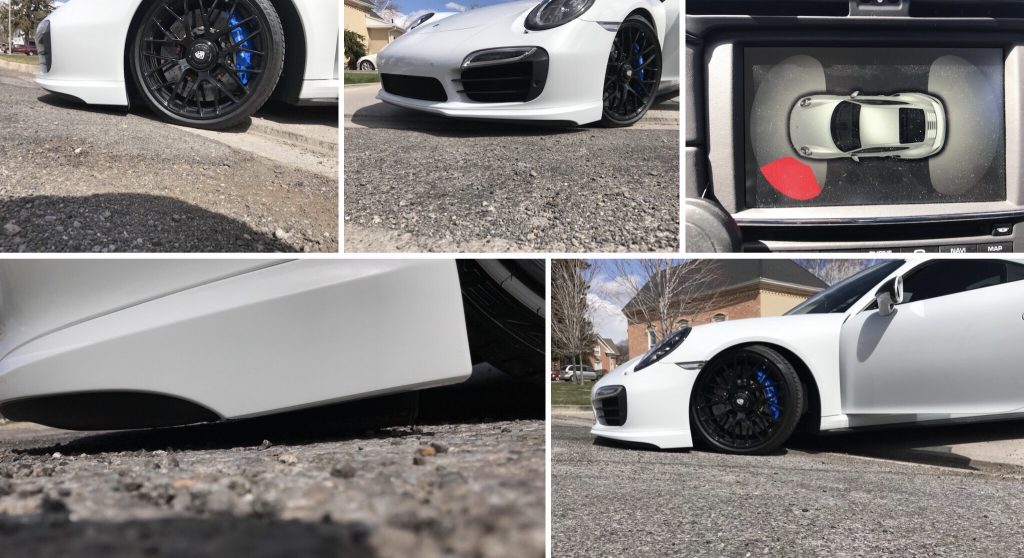
Stock wheel gap here isn’t too bad. It’s hard to believe my car used to look like this 🤔

Fast forward a year or so and dropping the car was on my radar. After doing some research I settled on GMG’s lowering springs and ordered a set. I debated about whether or not to install them for nearly a year. My primary concerns were threefold:  1) How would the springs would affect the ride? 2) I felt stressed out about rubbing the front of the car when I drove over dips and uneven roads* (I have had other lowered cars and have done my fair share of nose grinding). 3) Would the stock wheels look okay on a lowered chassis (the centerlock offsets place the wheels a few mm inside of the fenders).

*This is a big deal on the 991 Turbo series because it has a retracting front spoiler. If you rubbed the underside of the car’s nose you’d actually be grinding the spoiler on the ground.

Eventually I decided to just go for it. I hoped the retractable front spoiler design would allow the car to have the clearance it needed. And who cares about ride quality when your car could look a little nastier. Plus if things didn’t looks right it would be a great excuse to get a new set of wheels. Can I get an “Amen”?

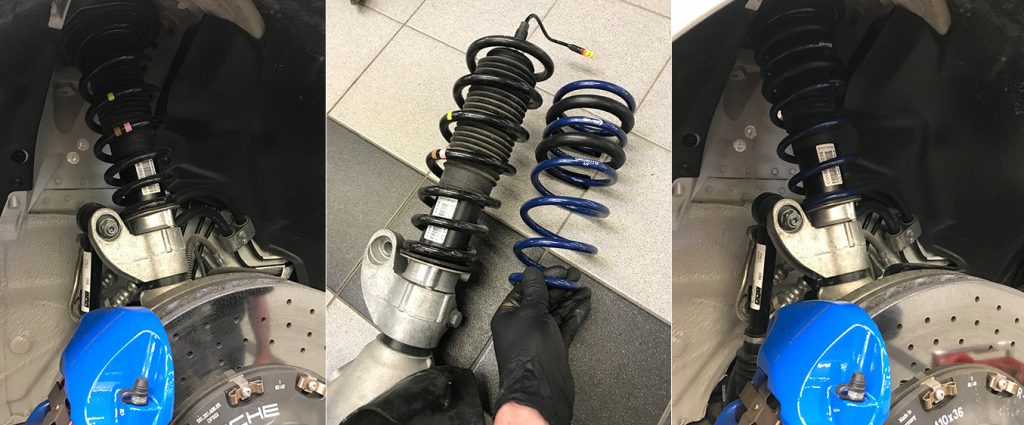
The guys @ Ken Garff were nice enough to take a few pictures of the install for me along the way. Don’t forget- when you have these installed you need to realign the car!

I dropped it off at my dealer on Monday and picked it up on my birthday a few days later. The install went well and when they did the alignment everything was within spec. I couldn’t believe how much of a visual difference the drop made (it ended up being abut an inch). Somehow it changed the car’s whole stance. The reaction at the dealer seemed very positive- several people there expressed how much they liked the modified look.

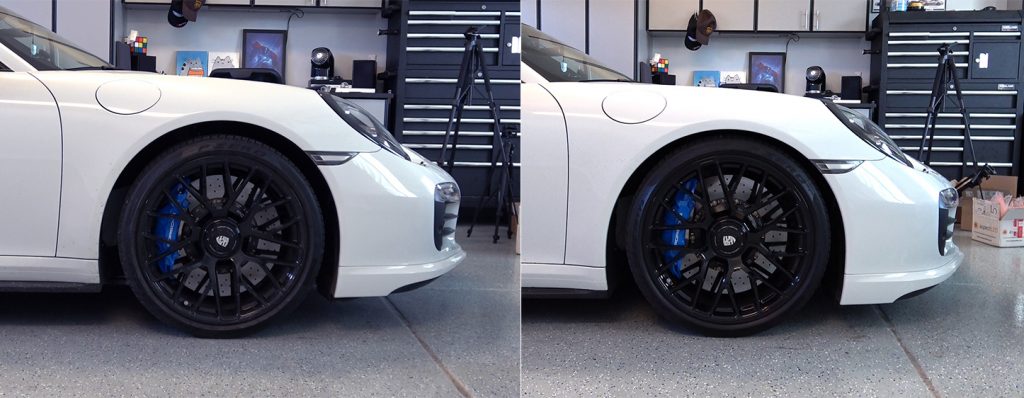
This is the ride height difference. The bottom of the wheels here are lined up with each other and you can see the gap difference which ended up being about an inch.

My concerns haven’t played out at all (yet?). I don’t really notice a difference in ride quality. It might be slightly stiffer but it’s extremely minimal. No undercarriage rubbing so far (although I still have a few places I haven’t gone yet that worry me). As for the stock wheels- they look good! Would they look better pushed out a hair? Perhaps… but I’m not even going there right now. So for I’m really pleased with this upgrade. Or maybe it’s a downgrade. Recommended 👍

Below is the video I eventually compiled:

From the video: Turns out that some dips are pretty tough to get through. All in all, 99% of the places I drive have been fine (I even went out and did some late night testing of areas where I know I’ll be driving the car). 

Darwin Pro Carbon Fiber Headlight Rings – Porsche 991

As many of you know I am a carbon fiber addict (and apologize for saying this over and over and over… but the first step to overcoming an addiction is admitting you have one).  I have been looking for ways to add a little more carbon fiber to the front of the car. The headlight rings have been on my radar for awhile but I resisted the urge because- and this may sound crazy- I don’t like to add carbon fiber just for the sake of adding carbon fiber. It’s nice when there’s some kind of functional benefit. But who am I kidding… I loved the set I had on my 997 so I knew I would like these too.

This was a fairly inexpensive set and I’m pleased with it, for what it is. The fitment is good (one side was slightly warped but I was able to get that sorted out alright) the quality acceptable and they look great. I had to use my own adhesive which was fine (all of this is covered in the installation video).

The one thing I’d nitpick is that the weaves weren’t complimentary. Typically, as I explain in my video, I’d expect to see the weaves running in opposite directions where there is a distinct left and right piece. Having them run in the same direction isn’t really much of an issue and my guess is that most people wouldn’t even notice this discrepancy. I thought it would bother me but having had them on for a week it’s not an issue.

Overall I think they are a nice addition. It’s a good way to get some carbon fiber on the forward facing end of the car. It’s a non-permanent addition too – if I find a nicer set down the road I should be able to swap them out with no issues. The parts were ordered from eBay seller dpro6097 (the eBay division of Darwin Pro). Customer service was responsive when I asked them about the issue I was having with a warped part.

Sideshow Statue: Batman vs. Superman

Let’s be serious for a minute. Batman is, far and away, my favorite super hero. I loved the comics, I loved the animated TV shows, I manged to cobble together some love for a few of the movie franchises. Recently Dawn of Justice pitted the Word’s Greatest Detective against the Sun-Powered Boy Scout. Say what you want about the movie, but I felt like they finally nailed the costume. This is the kind of costume that a picture doesn’t do any justice. Owning a picture of this would be an embarrassment. In cases like these you need a lifelike statue to showcase this level of excellence (I’m not sure if I know how to be serious). And so I present to you, Batman:

If you decide to get one use this link and I can get some referral points: Magical Buy a Batman Statue Link
I have no illusions that anyone will click through this link and buy this guy, but nothing ventured, nothing gained. It’s seriously a great figure.

Aspheric Mirror Installation & Function – Porsche 991

I love the lane change assist in my wife’s Yukon. When they added the same feature to the new generation of 991 cars I lusted a bit. Adding it wasn’t an option so I opted for the next best thing (although as I use it I’m starting to think that it is the best thing): Aspheric Mirrors!

Function: most of the mirror is flat and works like a typical side view mirror. However, the outer edges are concave and provide a larger, albeit distorted, field of view. You get a few more feet of side vision and this completely eliminates the blind spot on both the left and right as cars come from behind. As a car passes you can see that car in the side mirror all the way until it becomes visible in your actual peripheral vision. It works extremely well. Additionally you get a much larger field of view behind your car which makes it easier to back out of a parking spot.

Installation: As far as modifications go this one is among the easiest. The mirrors simply snap out of and into place. The only danger here is that if you’re not careful you could potentially crack the mirror. My video below demonstrates the removal, installation and function of the aspheric mirrors on the 991 platform.

Cost: The mirrors are expensive- there’s no question about it. The only real consideration here is how much do you want to see? Realistically you only need the driver mirror as it’s difficult to crane your neck around and look behind you. The passenger mirror is not absolutely necessary but I wanted my mirrors to match (cause I’m a freak like that). I felt they were worth it to me personally because I have struggled with blind spots and have difficulty turning my neck (due to an injury).

I admit I am perpetually looking for ways to modify my vehicles so I don’t really need a good reason to do stuff like this. However, having done it I’m very happy with the upgrade and would definitely recommend it. It’s good enough that I would probably consider skipping the lane change assist feature on a future 991 and simply adding aspheric mirrors. Shocking, i’m sure.

MACarbon Steering Wheel Installation – Porsche 991

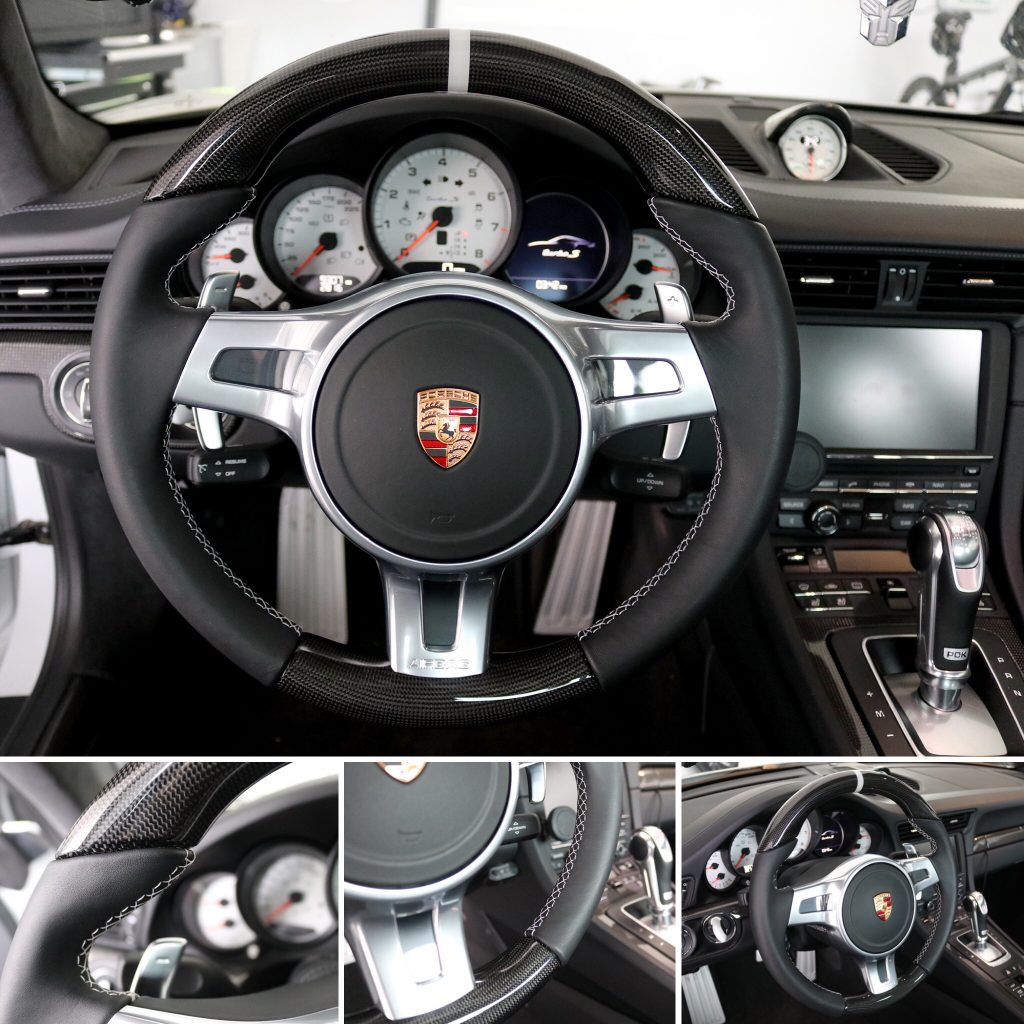
I have lusted after the MACarbon custom steering wheels for long time. Last year I decided that I was ready. No matter the cost, no matter the wait… I was all in. I submitted the order for my wheel in October and hoped it would come in time for Christmas (my ignorance knew no bounds). I worked with John, who was fantastic. He suggested the white stitching on the leather portion of the wheel and I love how everything turned out.

Below is a video showing an overview of my steering wheel and demonstrating the wheel removal process on a Porsche 991:

The wheel was completely worth the wait! I’ve purposefully tried to balance the interior and not get too carbon fiber crazy (real crazy). I’ve kept a good mix of Aluminum present (i.e. door pulls, pedals, shift knob) and so I left the center of the wheel silver. But the carbon fiber dash accents flow perfectly with the top and bottom of the wheel, which are also carbon fiber. All in all I feel like it’s incredibly complimentary and perfectly inline with the vision I have for the car. The only drawback so far is that the carbon fiber parts of the steering wheel do get a little colder than the leather (not great on wintry days)…  Still one of my all time favorite upgrades!

I really enjoy the process of customizing my car. I feel like each modification makes my car into something more one of a kind and that uniqueness beings a lot of satisfaction. I’m glad I did’t shy away from carbon fiber this time around. Also, I can’t say enough nice things about having a cool dealer right up the street- infinitely convenient.

MACarbon Seat Belts (Front & Rear) – Porsche 991

The first time I laid eyes on these carbon fiber seat belt buckles (from MACarbon) I knew I’d have them in my car one day. It was a bit of a mental fight- they’re not cheap and the buckles I already had worked quite well- but the fever from my mod-bug infection was at an all time high. I’m pretty sure my order for these parts was placed in September of 2017! But good things come to those who wait, right?

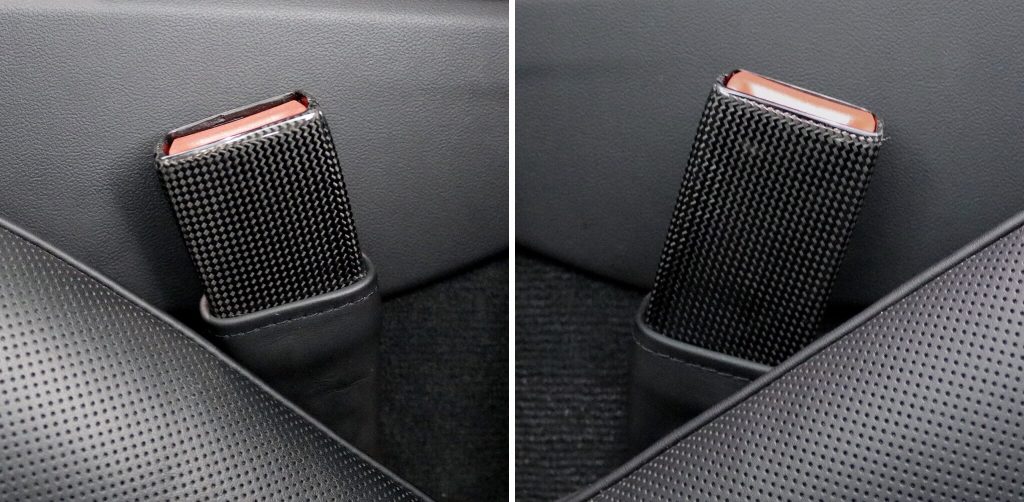
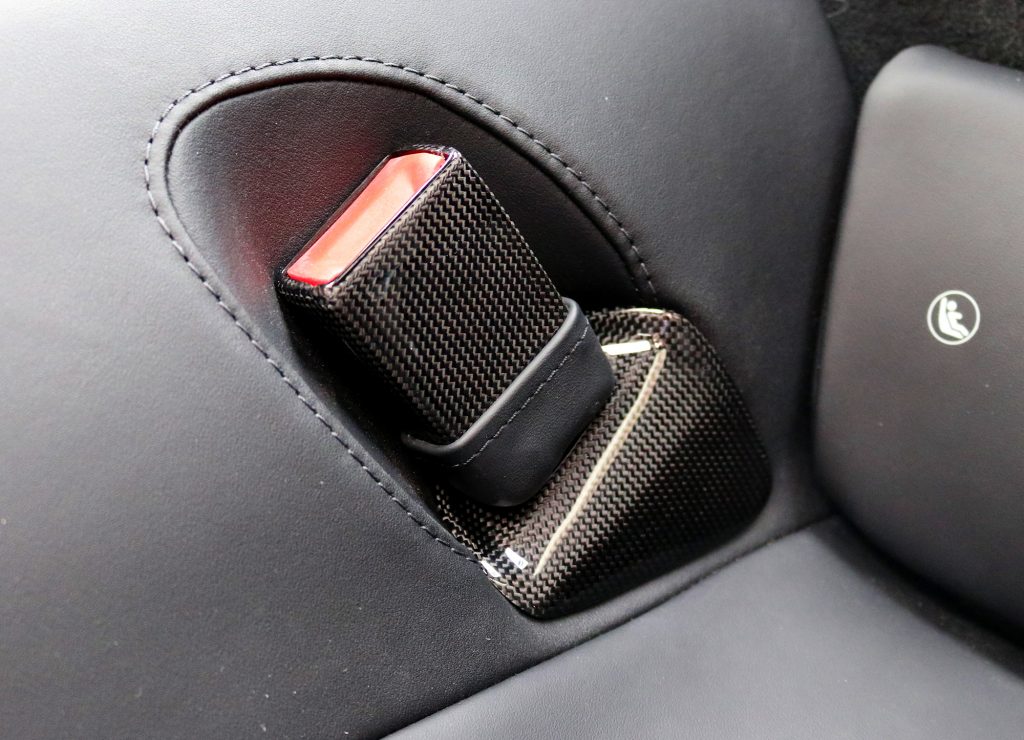
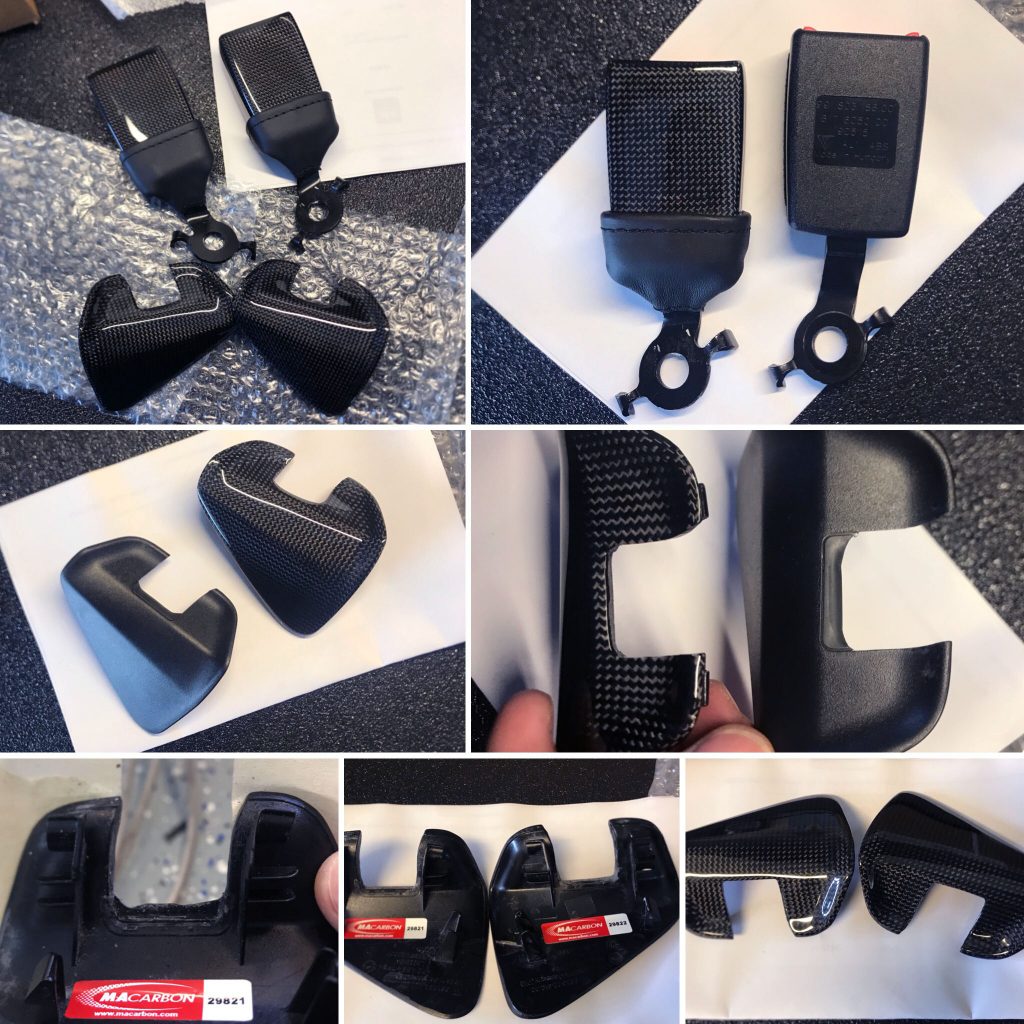
These carbon fiber covered buckles really step things up a notch as these parts are surprisingly visible (not so much in the back, I suppose). The leather covers on the front buckles looks great and hides the wires that run from the buckle into the seat. The rear buckles have a nice leather base and then that’s framed by the carbon fiber trim- a good looking setup!

Driver buckle & passenger buckle

Left and right rear buckles are the same

I originally had these on my “to buy” list with a note that said “what is wrong with you?” This was a hard purchase to justify but I managed to push it through and I’m happy with the results. It’s the little things (“Is this guy serious right now??” Half).

Below is a tutorial of the installation process (for the fronts):

Quick comparison of new parts with old parts. Rear seat belt installation is really easy… unless your pieces aren’t made quite right. Such was the case with my shipment. The surrounds needed to have some of the carbon fiber removed. MACarbon kindly offered to pay to have them returned for a fix but I told them I could take care of it. It was no problem- I milled them down a bit with my trusty Dremmel and  I got the parts installed in no time.