Security Bugs (Me)

Sometimes security “features” perplex me. For example, last week I wanted to change my user name on eBay to “utahcorvette.” To my dismay eBay informed me that me user name couldn’t match my email address (my user name @gmail.com).

Supposedly the theory behind this is that eBay is protecting me from spammers. Theese terrible spammers could  add common email extensions (i.e. @gmailcom, @yahoo.com, etc) to my user name  and send me email! As much as I appreciate big brother looking out for me I wanted “utahcorvette” as my use name and I got it.

For those of you who don’t know, Gmail has a pretty cool feature: you can actually add extensions to your email address. Just use the “+” sign after your real user name and then add extra text. For example, let’s say your email was corvetteman@gmail.com and you wanted your eBay user name to be “corvetteman.” You’d simply change your email address with eBay to something like “corvetteman+ebay@gmail.com.” Gmail will ignore anything after the “+” sign (your email will be delivered normally) and eBay will let you use the user name you want (“corvettecam”) since it’s  not the same as your email now. Win!

Sometimes security measures bug me, but if you look hard you can usually find a way around them.


Posted by Cam, July 18, 2011

My Car Rocks (How to Get Rocks Out of Your Body Panels)

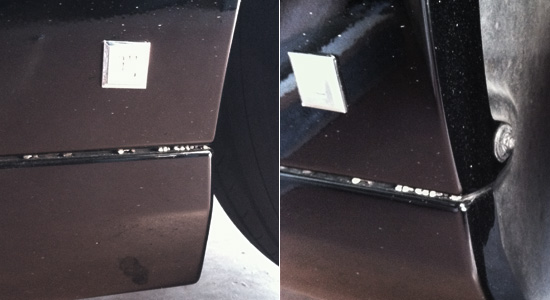
This is a post about rocks. Tiny rocks that get stuck between body panels near the rear tires. If you have a C6 Corvette chances are you know what I’m talking about. I’m not sure if this is a design oversight or if I just live in a place with way too many tiny rocks (and I will state again for the record that Utah roads are awful!). Anyway, here’s a quick little guide to get rid of your rocks so people don’t make fun of you!

The area where I see the most rock buildup is near the rear tires. Rocks actually get shot up over the wheel well casing, into the side wheel panel and drop down, getting stuck between the two body panels. Luckily getting them out is pretty simple.

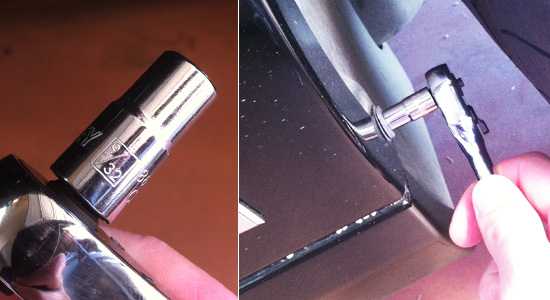
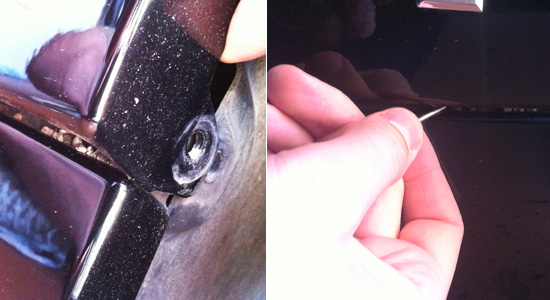
Grab your socket wrench and a 9/32 hex head bit.  Carefully loosen the screw shown (it’s the one opposite the rear wheel) and pull it out.

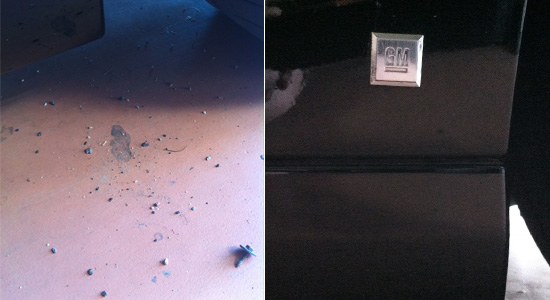
Gently pull out the body panel, separating it from the panel below. This creates a nice gap and you can use a toothpick, flat head screwdriver (anything, really) to carefully push out the rocks.

I usually have quite a few rocks (this is about two months of rock build up and I drive my car maybe100 miles a week). After you get everything cleaned out just push your panel back, put the screw in and voila! Good as new. Repeat on the other side.


Posted by Cam, July 1, 2011

Going Home

For nearly the last two years I’ve had my Corvette parked at work. This was a mixture of convenience (not mine), protection (from my kids) and a high novelty factor (that quickly wore off). As I previously mentioned, keeping the car at work had some serious drawbacks (like the fact that I couldn’t use it very often). But work could use the room, the kids are older, and I need access to my car and so the time has finally come to bring my Corvette home.

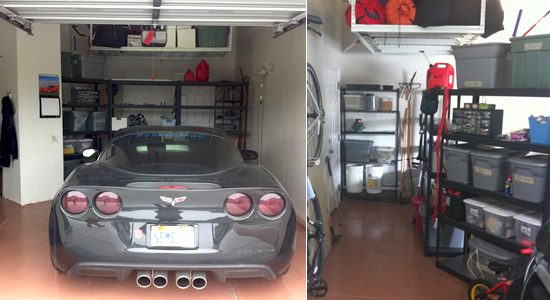
My  biggest concern having the car at home is my kids. Behind the area where I would park my car is a door that leads to the backyard. That door is the one that the kids use to go in and out of the house all day (this gives them access to to the mudroom we put in last year). In the past walking by my car seemed to necessitate touching it, scratching it, climbing on the hood and other various forms of torture. So before I moved the car home I had to come up with a way to protect it, just in case. Shelves to the rescue.

After careful consideration I decided I could build a wall out of shelves. The wall creates nice wide walkway to the outside door, a cozy protected parking spot for my car and adds valuable storage space. While I was at it, I moved around some other shelves and our freezer. Overall I’d say the flow of our garage is actually enhanced.

I’m really looking forward to using my car more this coming spring. I just hope the weather improves. It seems like we have rain or snow five days out of every week.


Posted by Cam Hughes, April 09, 2011

Human Target: Chance’s Corvette

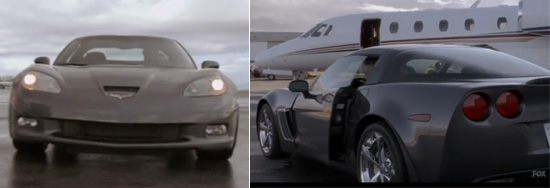
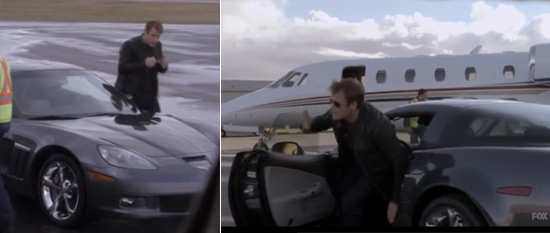
I’m a big fan of Fox’s Human Target. I’d love to give a critique of the show, but that would be a post for one of my other blogs  (that will never get made). Suffice it to say, I was thrilled when Chance pulled up in a Chevrolet Corvette GS (I was getting sick of him driving that Camaro around).

Human Target - Chance's Corvette

At first I couldn’t quite tell what model it was. It looked kind of like a Z06, but it also looked like a coupe. I confess I had to do a quick search online to determine it was GS. I haven’t kept up on Chevy’s upgrade packages lately. It’s a sweet looking car. Even though I prefer black bodies and blacked out rims I can still appreciate this beauty.

Human Target - Chance's Corvette

I haven’t seen too many Corvette’s on TV (at least not on the shows I watch) so this was a nice little surprise. I hope Chance keeps driving it!


Posted on Feb 27, 2011

On the Road Again (How to Remove Your Tires)

I finally got to take Vanessa out of a spin (my car’s name is Vanessa, remember?). We had a fabulous time cruising Utah County and blasting our favorite tunes (I’m only a little crazy). I really wish there were more places where I could drop the pedal and let loose. This car is built for speed and I really don’t get to take advantage of that. Sometimes I think maybe it’s time to get a new hobby… but then I go for a ride and fall in love again.

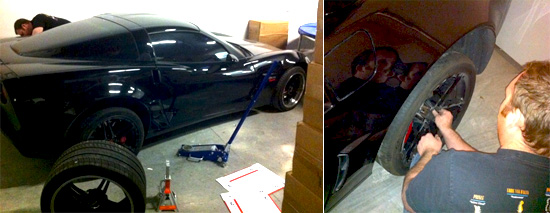
So yesterday I swung by work to help Jim swap his tires (the pictures below are his car, not mine). He’s got a set of Forgeline rims in the back and the leak. Not the tires- the rims. These particular rims are a three piece forged set and the leak is occurring where the pieces are bolted together. Yes sir, with this kind of performance even your rims need maintenance.

Anyway, I helped Jim swap his wheels off. Wheel swapping is pretty easy on most cars. Vettes with tires that are 12.5″ across and that weigh about 40 lbs are a little trickier. Just a quick set of instructions to help all you people who want to change their Vette tires (or any tires).

Items I recommend:
1. Car Jack (low profile)
2. Jack Pads
3. Torque wrench
4. Wrench extender (pictured in kit above- you may need this is your rims have deep lips).
5.  Wrench bit that fits your lugs (size will vary based on what wheel you have on your car).
5. Locking lug key (if applicable- sometimes nice wheels come with a special lug to deter theft).

Steps to remove / change tires:
1. Put your parking break on.
2. Underneath the car about to feet from the rear ties there is an oval hole. You can put your jack pad there or jack directly from this spot.
3. Carefully position your Jack and pump it up until it’s firmly in place, but don’t lift your car of the ground yet.
4. Loosen your lugs. Here’s a great article on wheel lug torquing, including how to loosen and tighten your lugs.
5. Jack the car up until the tire is off the ground. You can use a car jack stand if you can any concerns that your car might fall.
6. Finish loosening the lugs and remove them.
7. Firmly grip the tire and pull it off the vehicle (and remember, you can roll a tire- you don’t have to lift it to put it somewhere).
8. Give you rotor and brake calipers a little cleaning if you want
9. Lift on the new tire, light up the holes with the lug bolts, and refer to the torquing guide above again.
10. Remove you jack lift (if applicable), lower your car and repeat on the other side.
Remember: after you drive you car 50-100 miles you should tighten the lugs again!

Just in case you’re curious about why you’d be removing or changing tires, here a few good reasons:
1. You’ve got one set of street tires and one set of track tires and you need to switch them.
2. You’ve got a flat and you’re putting on a spare
3. Wheel maintenance (tire, rim, TPMS, etc).
4. Assembly maintenance (breaks, calipers, rotor, etc)
5. Left / Right tire rotation
6. Because you’ve got a sick idea of fun.

Anyway, now that the weather is a littler better (could we do something about these roads? They are awful!), batteries are charged and wheels are swapped maybe you’ll see us on the road again.


Posted Jan 30, 2011 by Cam Hughes

Battery Blues

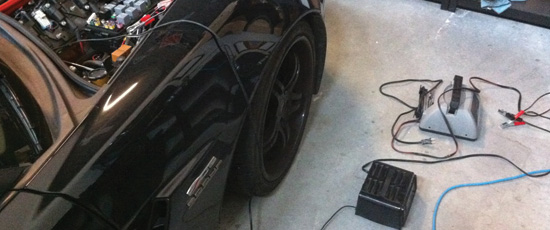
I miss the good old days when cars were simple. If your battery was dead then you car didn’t start. That was it. But now… oh man.

Dead Battery

The weather was actually pretty good a couple of days ago. A lot of the snow had melted and the roads, for the most part, were dry and free of debris. I thought I’d take my car for a quick spin so I headed over to work to pick it up.  I recently got the Tron soundtrack and thought it would be fun to listen to it on my car stereo. It probably would have been…

My first clue that there was going to be a problem was when the door didn’t want to open. I waved my key at the car and said a few encouraging things and the door finally unlocked. The interior lights seemed fine so I pushed the ignition switch. The car began to have convulsions. It made several loud clicks (the starter unsuccessfully trying to turn the engine over), the stereo blared to life accented by crackling, the interior lights began to dance, both windows rolled down about an inch and the left headlight started to flicker. I turned the car off. But you know cars these days. When you turn them off they don’t actually go off. The left headlight kept sputtering and the lights on the dash flickered uncontrollably.

I might have been able to do something about, but that that moment a voice said, “Sir, can you please step outside?” I hopped out of my car, and shut the door, hoping that would let the car know we were done. I turned around and was greeted a police officer. “What are you doing?” he asked.  I suppose I looked a little suspicious…standing there with the bay door open… apparently hot wiring a corvette… .at 1:00am.  I managed to soothe the policeman and returned to the task at hand.

The door was giving me trouble again. Back to square one. I went to pull  my key out  to show the car that everything was okay. No keys. I looked around for a bit and then it hit me. I pressed my face against the car’s window. Beneath the dim interior light I cold see the key nestled safely in the cup holder. Deja Vu.

I tried to stay calm. I explained the problem to the car and tried to the door again. To my disbelief it opened. I grabbed the key, popped the hood and got to work. The car clearly needed a charge. After I got things hooked up I wandered around work for a few minutes trying to decide if I’d go home or wait for the car to charge (Tron’s music was still beckoning and, after my ordeal, I would have enjoyed a drive). That’s when I noticed a charger that Jim had brought to work for his car (which, ironically, was also sitting dead in our shop).  “This has a jump start feature!” I noticed excitedly.

I switched the battery chargers out and set Jim’s charger to the jump mode. I gave a the car a few minutes and then climbed back inside to try again. No blinking dashboard lights- good.  I pushed the ignition button again. The car briefly turned over and then reverted back to clicking mode. The lights flickered and then the left headlight went out completely. I turned the car off and the right headlight began to strobe and the left window dropped halfway down. My radar detector turned on and the “low voltage” warning light blinked at me. Nice.

That was enough of that. I put my old charger back on, set it to trickle charge and went home. The next morning I went back to see how things had gone. I unhooked the charger. No problem getting into the car. I fired it up. It turned over perfectly and everything seemed in order. I revved the car a few times. Awesome. All the stereo presets were even intact. I’d brought her back from the edge of life!

And I would have gone for a drive that night except mother nature decided I was clearly in need of a break from my car. It snowed about three inches in the late evening. And that’s my story. I guess you could say I got the battery blues. Yeah I got the “my car won’t start, ’cause the battery is dead” blues.


Posted by Cam Hughes, January 9th, 2010

Sticker & Emblem Insanity

UPDATE (October 16, 2011): Yes, I’m still hard at work adding stickers to my car! I recently found a company who manufacturers stickers that fit in the “CORVETTE” indentations on the rear bumper and  passenger dash. I picked Victory Red for the exterior and Cobalt Red for the interior.  The same company also offers black vinyl stickers to cover the white and yellow air bag warnings on the sun visors. Done and done!
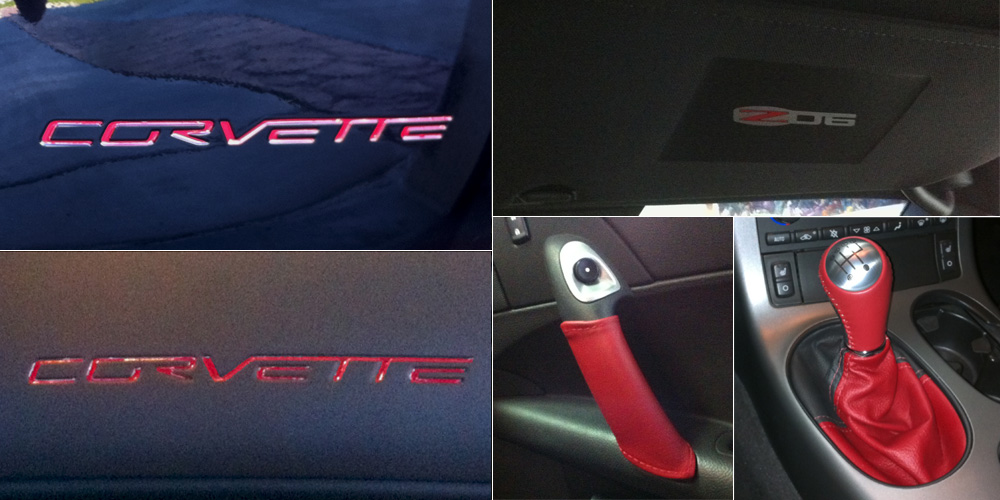
In addition to stickers I’ve been adding some  accents in the car. I recently installed a tone shift knob and some leather door wraps (both Cobalt Red) that match the seat. I also put in new Autometer ES series gauges (backlit red) and I’m considering replacing my gauge cluster with a red model. To me form is as important as function.


To begin with, I apologize for the pictures. First, because no one really wants to see them. And second because I took them on my iPhone. Cameras on phones have come a long way, but it’s still hard to take pictures in low light (a lot of graininess and motion blur), close ups, and anywhere you might need a half way decent flash. But you can’t beat a camera phone for convenience. But I digress. I now present to you my… quirk.

Plastered across my rear windshield is a “Benchmade” banner.  My company, BladeHQ, sells Benchmade Knives and, being a loyal fan and purveyor, I proudly advertise Benchmade on the back of my car. I also have a Microtech sticker (Microtech Knives are also very cool) but I’m not sure if there’s room for it right now.

On the front left of the windshield I’ve got an ACT sticker (I just put in a new ACT clutch) . The red and silver won me over. I’m a sucker for a fun sticker.

On the front right of the windshield I’ve got an HP Tuners sticker (this is the program I use to tune my car). I thought the white added some nice contrast.

On both sides of the car, below the Z06 badge, I added custom “800 HP” emblems (from West Coast Corvette). I unabashedly promote the current crank horsepower of the car in the same way the stock C6  Z06 badge does (in tiny red letter it says, “505 HP”… but it’s not anymore!). I get a lot of flak for this, but I can take it.

Inside the engine (on top of the intercooler) I’ve got a little plaque that that has the engine specs for the LS7 (left side) and then an “LS7” emblem (right side). They add a nice little splash of color to the engine bay (can you tell I like red, black and silver?).

And of course I’ve got my car peppered with various red Autobot decals. Yeah, maybe I need some help. I try not to make things tacky (believe me, everything looks much better in real life), but it’s possible that I do go overboard sometimes. To my credit I haven’t added a “twin turbo” emblem…. yet. But then again,  I am guilty of putting a Hannah Montana sticker on the drill press at work and insisting that everyone refer to it as “Miley.”

Anyway, I hope this handy guide will help you to recognize my car. It may be hard to see anything though, since I’ll be blowing past you at light speed. Ooooh!


Posted November 09, 2010

You Win Some, You Lose Some…

I did manage to get the clutch installed before the last race at Rocky Mountain Raceway (RMR). More on that in a bit. First, I’ll do a quick review of the clutch. As I mentioned the clutch I went with was the ACT T1S-G01 (BTW- I ordered it from AA Corvette and I can easily recommend them as a great source for parts).

After getting the clutch installed (another BTW- clutch installs on the Z06 models are a PITA!) I only had  a couple of days to break it in before th race so I drove the car a lot. I’d been warned to expect harsh engagement and a lot of noise from the clutch, owning to the fact that it’s a twin disc model. I found the engagement to be very smooth. In fact I can put the car in  gear and just slowly life my foot off the clutch and it and it rolls forward without so much as a shudder. No problem on that end.

Noise-wise there is a lot of chatter in lower gears (when the RPM range is sub 2K). Occasionally when the clutch is disengaged it will even sound like popcorn popping (I’ve got not better way to describe it). The sound goes away when the clutch pedal is depressed. My understanding is that this is normal. In any event, I can live with the noise so it’s not an issue (my stock clutch had almost as much chatter)

Performance-wise the T1S-G01 is a rock. The clutch grabs perfectly and my street tires spin out in 1st, 2nd and sometimes 3rd . In fact, I had no idea just how often my previous clutch was slipping until now. The stock Z06 clutch weighs in at 55 pounds (I popped in on a scale when we got it out). The T1S-G01 weighs in at only 39 lbs. That’s a difference of 16lbs of rotating mass! It took the car a couple of weeks to adjust (it was surging at stops pretty bad from the change).  The new clutch is rated up to 85o lbs of torque so it should last me awhile (I’m only sending about 670lbs to it so there’s still  room for a few upgrades). Overall I really like ACT T1S-G01 and would recommend it to anyone wondering who’s considering it.

And at the same time I decided to upgrade the sway bars in my car. I went with the PDAFT Z06 Light Rate Racing Sway Bars and so far I really like them.


The stock sway bars hit the turbo piping in the front of my car. The PFADT bars are adjustable and so we were able to make them fit better.  They still hit a little (when going over larger bumps) but it’s much better than before. Additionally the car’s handling is improved  it sticks to the road even better than before. Another upgrade that I’m very happy with.

But you can’t win them all. It was sway bars or slicks. Since it was the last race off the year at RMR I decided to skip the slicks and do the sway bars. (there were still months of driving left). The clutch wasn’t quite broken in, but I decided to go for it. I actually ended up near the front for my first run so the track was really fresh. I wasn’t completely comfortable with the clutch, but I was not prepared for the spinning. I launched and spun… and spun… and spun. I ended up running a 13.8 at about 117 mph. Ouch. I got a second run too which wasn’t much better. Next year I’ll be ready though. Slicks and some practice and I’ll bet I can hit the 11’s. Fingers crossed (again).


Posted November 06, 2010